The puddle dropped out before I even finished the tack, leaving a jagged hole where solid metal should’ve been. Thin sheet can humble you fast, especially when heat builds quicker than you expect. That’s exactly when I started asking myself how to weld thin metal without burning through — because guessing clearly wasn’t working.
Thin metal doesn’t forgive mistakes. Too much amperage, slow travel speed, or the wrong technique can ruin a panel in seconds. I learned this by warping panels, blowing holes, and grinding out more bad welds than I’d like to admit. But once I figured out how heat control, torch angle, and timing actually work together, everything changed.
Getting this right means cleaner beads, less distortion, and strong joints without endless patchwork. It also saves material, time, and frustration — especially when you’re working on auto panels or light fabrication. Let me show you the practical techniques that actually keep thin metal intact while still giving you solid, professional welds.
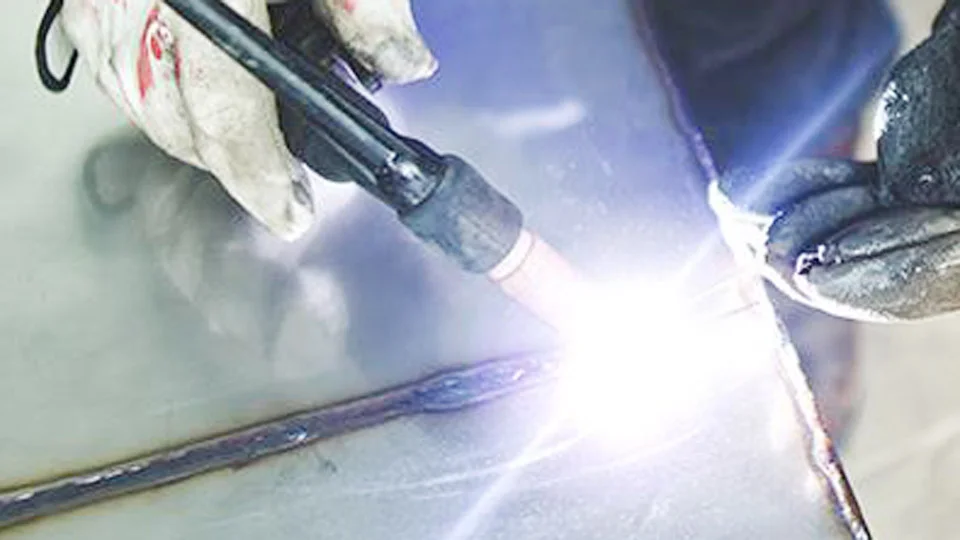
Photo by red-d-arc
Why Thin Metal Is a Whole Different Beast
Thin metal—think anything under 1/8 inch, like 18-gauge to 22-gauge sheet—doesn’t forgive mistakes the way thicker stock does. The heat from your arc or flame travels straight through it, superheating the area around the weld and causing it to warp, crack, or straight-up melt away. I’ve seen guys burn through 1/16-inch mild steel in seconds because they treated it like 1/4-inch plate.
The physics is simple but brutal. Heat input is the enemy here. Your welder pumps energy into a tiny zone, and with thin material, there’s nowhere for that heat to go but out the other side. This leads to:
- Excessive penetration: The weld pool eats right through.
- Distortion and warping: The metal pulls and twists as it cools unevenly.
- Burn-off on rods or wire: Electrodes melt too fast, leaving you with weak, porous beads.
- Rework hell: Fixing a hole means grinding, patching, and starting over—wasting time and filler.
In my shop, we deal with this daily on auto body repairs, HVAC ductwork, and light fabrication. One wrong setting, and a $200 sheet of stainless becomes landfill.
But get it right, and you can weld like a surgeon, creating joints that look factory-fresh. The key? Understanding your process, prepping like your paycheck depends on it, and controlling heat like it’s a wild animal.
Choosing the Right Welding Process for Thin Metal
Not every welder is built for thin stuff. I’ve run Lincoln, Miller, and Hobart machines for years, and the process you pick can make or break your day. Here’s how I break it down in the shop.
MIG (GMAW) is my go-to for most thin metal jobs. It’s fast, forgiving for beginners, and excels with short-circuit transfer mode. Why? The wire feeds continuously, and you can dial in low voltage and wire speed to keep the arc cool. On 20-gauge steel, I’ll set my Miller Millermatic to 15-18 volts and 100-150 IPM wire feed—barely enough to melt the wire without cooking the base.
TIG (GTAW) shines for precision work. If I’m welding stainless exhaust pipes or aluminum bike frames, TIG gives me total control. The foot pedal lets me feather the amperage on the fly, starting low and pulsing to avoid heat buildup. It’s slower, but the results are clean—no spatter, no slag.
Stick (SMAW) works, but it’s the underdog for thin metal. Most folks think you can’t do it, but with the right rod and settings, it’s solid for field repairs. The catch? High heat input from the arc means you have to be quick and light on the trigger. I only pull out my Lincoln Ranger for stick on thin stuff when I’m out on a job site without gas.
| Process | Best For Thin Metal Thickness | Heat Control Level | Skill Needed | Shop Cost |
|---|---|---|---|---|
| MIG | 22-gauge to 1/8″ | Excellent (pulse/short-circuit) | Beginner to Pro | Low (wire + gas) |
| TIG | 24-gauge to 3/16″ | Superior (pedal + pulse) | Intermediate+ | Medium (argon) |
| Stick | 16-gauge to 1/8″ | Fair (short arc) | Intermediate | Lowest (rods only) |
In practice, I start with MIG 80% of the time for thin steel. It’s what most USA shops use for bodywork and light fab. But if the metal’s under 0.030″, TIG is non-negotiable.
Best Welding Rods and Filler Metals for Thin Metal
Picking the wrong rod is like using a sledgehammer on a watch. For thin metal, you want small diameters and low-hydrogen types that run cool and clean.
For Stick Welding:
6013 rods: My everyday choice for mild steel. The 3/32″ size at 40-60 amps gives a soft arc that doesn’t dig in. I’ve used these on trailer hitches and sheet metal patches—smooth beads, easy slag release.
7018: For structural thin stuff, but only if it’s clean and dry. 1/16″ at 30-50 amps. Avoid if you’re in a hurry; it needs a hot start.
E6010 or 6011: For dirty metal or out-of-position, but crank the amps down and weave lightly. These run hotter, so they’re riskier on thin.
MIG Wire:
0.023″ or 0.030″ ER70S-6: The sweet spot. Thinner wire means less heat per inch. I run it on my Hobart Handler with 75/25 gas at 14-17 volts. On 18-gauge, this lays a flat bead without blow-through.
TIG Filler:
ER70S-2 or 6 for steel: 1/16″ rod, dipped sparingly. For stainless, 308L. Aluminum? 4043 at super low amps.
Common mistake I see? Grabbing 1/8″ rods for everything. That extra mass means more heat, more burn risk. In one job, a newbie used 1/8″ 6011 on 14-gauge—ended up with a crater the size of a quarter. Lesson: Match diameter to thickness. Rule of thumb: Rod dia = metal thickness x 1.5, max.
Always store rods in a dry box. Moisture turns your weld into Swiss cheese.
Dialing in Amperage: Finding the Magic Number
Amperage is where most burn-through happens. Too high, and you’re vaporizing metal. Too low, and you get cold laps and no fusion.
Here’s how I set it up, process by process, based on years of running beads on test coupons.
Stick Amperage Chart (Mild Steel, Flat Position):
| Metal Thickness | Electrode Size | Recommended Amps | Travel Speed |
|---|---|---|---|
| 1/16″ (16 ga) | 3/32″ | 40-55 | Fast, 8-10 IPM |
| 3/32″ (14 ga) | 3/32″ | 50-70 | 6-8 IPM |
| 1/8″ (11 ga) | 1/8″ | 70-90 | 5-7 IPM |
Start at the low end and bump up 5 amps at a time. Watch the puddle—if it’s chasing the rod, you’re too hot.
MIG Settings (Short Circuit, 75/25 Gas):
- 20-gauge: 14-16V, 80-120 IPM wire speed, 50-70A
- 16-gauge: 16-18V, 120-180 IPM, 70-90A
I always do a test bead on scrap first. My go-to: Voltage low, wire speed moderate. The arc should sound like frying bacon, not a jet engine.
TIG Amps:
- 20-gauge steel: 20-35A DCEN
- 16-gauge: 30-50A
- Pulse at 1-2 Hz, 20% background for ultimate control.
Pro tip from the floor: On a Miller Dynasty, use the pulse function. It drops heat between peaks, letting the metal cool just enough. Saved me on a stainless tank repair last month—zero distortion.
Joint Preparation: The Secret to Strong, Burn-Free Welds
You can’t weld dirty metal. Period. Thin stuff amplifies every flaw.
Step-by-step prep I do every time:
Clean it like your life depends on it: Grind or wire-wheel both sides 1″ back from the joint. Use a dedicated flap disc—don’t cross-contaminate with aluminum oxide from steel.
Fit-up is everything: Clamp tight with no gaps. For butt joints on sheet, back it with copper or aluminum backing bars. These act as heat sinks, pulling excess heat away.
Edge prep: Bevel lightly if needed, but for thin, a square edge with 1/16″ root opening works. Chamfer corners to reduce stress risers.
Tack strategically: Space tacks 2-3″ apart, peen them flat to relieve stress. I use a small ball-peen hammer—light taps prevent cracks.
In my experience, 70% of burn-through comes from poor fit-up. One time, rushing a muffler patch, I skipped the backing. The heat sank into the pipe and blew a hole. Now, I always use a scrap piece of 1/4″ copper behind thin welds.
Welding Techniques That Keep Thin Metal Intact
Technique separates the pros from the pretenders. Here’s what I hammer into every trainee.
Travel Speed: Fast and steady. On thin MIG, 8-12 inches per minute. Slow down, and the puddle pools and burns.
Weave or Stringer? Stringers for thin—keep the arc moving in a straight line. A slight crescent weave (like a lazy C) on stick helps without overheating.
Gun Angle: 10-15 degrees push angle for MIG. Drag too much, and you’re burying heat.
Pulse Welding: If your machine has it (most modern MIGs do), use it. Peak amps for fusion, background for cooling. On my Lincoln Power MIG, I set pulse at 50-100 Hz for 18-gauge.
Backstepping: Weld in short 1″ bursts, skipping ahead, then backfill. This distributes heat and cuts distortion by 50%.
I learned this the hard way on a custom truck bed. Straight-line welding warped the 14-gauge floor like a potato chip. Backstepping fixed it on the redo.
Machine-Specific Tips for USA Shop Welders
Most of us run American iron—here’s the real talk.
Miller Machines: The Millermatic 141 is a thin-metal beast. Auto-set mode nails it for 20-gauge. For TIG, the Dynasty 210’s AC balance at 60% cleans aluminum without excess heat.
Lincoln Welders: Power MIG 210 for MIG—use the .023″ tip and 15V start. Stick? The Ranger 250 GXT with 6013 runs buttery at 45A.
Hobart and Others: Handler 140 is budget-friendly for hobbyists. Set to “thin” on the chart and go.
Always check your ground clamp—poor contact spikes amps and burns. I zip-tie mine to the bench for thin work.
Common Mistakes and How to Fix Them
Here’s the top offenders I’ve fixed in the shop.
Mistake 1: Too Much Amperage
Symptom: Instant hole.
Fix: Drop 10 amps, speed up travel. Grind the burn, weld over with a small rod.
Mistake 2: Wrong Gas or No Gas
Symptom: Porosity and weak welds.
Fix: 75/25 for steel, pure argon for TIG. No shortcuts.
Mistake 3: Overlapping Beads
Symptom: Heat buildup, warping.
Fix: Skip weld—tack, cool, repeat.
Mistake 4: Ignoring Distortion
Symptom: Bowed panels.
Fix: Clamp to a flat table, weld alternate sides, use heat sinks like wet rags (carefully).
One rookie I trained burned through a whole hood panel. We salvaged it by welding a doubler plate from the back—stronger than original.
Real-World Shop Stories: Lessons from the Bench
Last summer, we fabbed a set of fender flares for a Jeep. 18-gauge aluminum, TIG all the way. Started at 25A, pulsed to 40A peaks. The client wanted no warpage— we delivered with zero filler distortion. Key? Backing the entire seam with aluminum angle.
Another time, field repair on a grain silo—16-gauge galvanized. Stick with 6013, 3/32″ at 50A. Galvanized fumes are nasty, so respirator on, and I backstepped every inch. Weld held through a Midwest winter.
Safety Gear and Shop Practices That Protect You
Thin metal welding amps up the risks. Sparks fly, fumes rise, and that arc flash doesn’t care about your ego.
- PPE: Auto-darkening helmet (shade 9-11), leather gloves, flame-resistant jacket. I swear by my Jackson helmet—saves my eyes on long days.
- Ventilation: Shop fan pulling fumes away. For galvanized or stainless, extra exhaust.
- Fire Watch: Have a CO2 extinguisher handy. Thin metal ignites easy.
- Hot Metal Handling: Use tongs, not hands. Quench in water if needed, but sparingly to avoid cracking.
I drill this into students: “The metal doesn’t care if you’re in a rush—respect it.”
Advanced Tips for When the Job Gets Tough
For the pros chasing perfection:
- Heat Sinks: Copper backing strips, or even dry ice packs for ultra-thin.
- Tack and Skip Sequence: Number your tacks, weld 1-3-5, then fill.
- Post-Weld: Peen the bead while warm to relieve stress. Grind flush for paint.
- Material Match: Always match filler to base—mismatch causes cracks.
On a recent stainless sink repair, pulsing TIG at 1Hz with 308L filler gave a bead so smooth, the customer thought it was factory.
Wrapping Up
After all these years, welding thin metal without burning through boils down to respect—for the material, the machine, and the process. You’ve got the tools now: low amps, right rods, smart prep, and techniques honed on the shop floor.
Next time that sheet stares back at you, remember the test bead, the backing bar, and that quick travel speed. You’ll lay down welds that don’t just hold—they shine. Always keep a scrap bin handy. Practice on the real thickness before the money piece. Your future self will thank you.
FAQ: Answering Your Burning Questions
Can You Weld Thin Metal with a Stick Welder?
Absolutely, but it’s not for the faint-hearted. Stick on 16-gauge and thinner works with 3/32″ 6013 rods at 40-55 amps. Keep your arc short—1/16″ max—and move fast. I’ve done it on emergency tractor patches with great results. Just practice on scrap first; the slag can hide burn-through until it’s too late.
What’s the Best MIG Wire Size for Welding 20-Gauge Steel?
Go with 0.023″ ER70S-6. It runs cooler and gives better control than 0.030″. Pair it with 75% argon/25% CO2 at 14-16 volts. In my shop, this combo on a Millermatic has saved countless body panels from the scrap heap. Avoid thicker wire—it adds too much heat.
How Do I Stop Thin Metal from Warping During Welding?
Clamp it down tight to a heat sink like a steel table or copper bar. Use backstep welding in short bursts, and alternate sides. Peen the cool welds lightly. On one aluminum job, this cut distortion from 1/4″ bow to dead flat. Water-damp rags on the back help too, but watch for steam burns.
Is TIG the Only Way to Weld Really Thin Metal Like 22-Gauge?
No, but it’s the cleanest. MIG pulse or short-circuit can handle it with practice. For 22-gauge, TIG at 15-25 amps is king for no-spatter perfection. I use it on custom exhausts all the time. Stick? Possible but push your limits—better for 18-gauge and up.
What If I Already Burned Through—Can I Fix It?
Yes, but don’t panic. Grind the hole clean, back it with a copper plate, and weld a patch from the good side using low heat. For small spots, build up with multiple thin passes. I’ve fixed dozens this way—stronger than new. Just match the filler and grind flush.

Hi, I’m Zachary Ford. I’m passionate about welding and dedicated to helping both beginners and experienced welders make informed decisions. I research, test, and write about welding helmets, welding machines, safety equipment, and essential workshop tools. My goal is to provide honest reviews, practical buying guides, and easy-to-follow tutorials that help you weld more safely, work more efficiently, and choose the right gear with confidence.