Running a 7018 rod on a vertical joint can feel like a battle when the puddle won’t behave. Slag starts creeping where it shouldn’t, the arc feels inconsistent, and the bead doesn’t lay down the way you expected. In moments like that, the question naturally comes up: Do You Push or Pull Stick Welding?
It may sound like a small detail, but direction makes a big difference in stick welding. I learned through plenty of chipped slag and a few welds that had to be ground out that rod angle controls penetration, puddle control, and overall strength. Unlike MIG, stick welding depends heavily on how the flux coating and slag trail behind the arc.
Getting this right means cleaner beads, fewer inclusions, and stronger joints that actually hold under stress. It also saves time, rods, and frustration in the shop. Let me walk you through what works in real-world welding conditions and why one direction almost always gives better results.
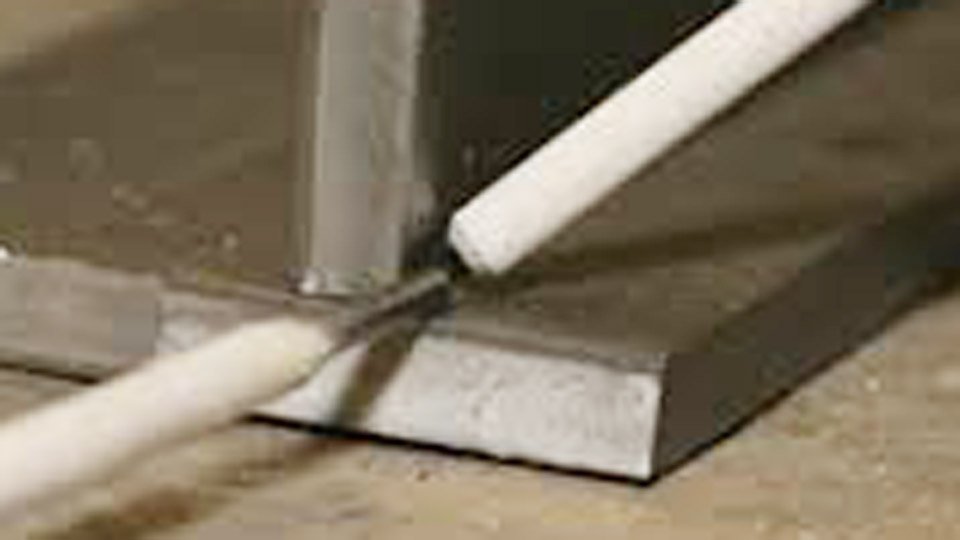
Image millerwelds
What Push and Pull Actually Mean in Stick Welding
First, let’s get the terms straight so we’re not talking past each other.
Pushing (forehand technique) means the electrode leads the weld pool. You’re moving the rod in the direction it’s pointing, like you’re shoving the molten metal ahead of you. The arc is in front, and the puddle trails behind the electrode.
Pulling or dragging (backhand technique) is the opposite. The electrode trails the weld pool. You tilt the rod back toward the direction you’re traveling, so the arc pushes the slag and molten metal behind it as you go.
In stick welding, the drag technique is king for one simple reason: slag.
Every SMAW electrode has a flux coating that melts into a protective blanket. That blanket has to go somewhere. When you drag, gravity and arc force keep it riding behind the puddle. When you push, the arc forces it right into the leading edge of the pool—and it stays there, trapped forever.
I’ve seen 7018 welds that looked textbook on the surface but failed X-ray because someone decided to “push for better visibility.” Visibility is great until the inspector hands you a rejection tag.
Why the Direction You Travel Matters More Than Most Welders Admit
This isn’t just about pretty beads. Wrong travel direction hits you in the wallet and the safety record.
Penetration
Drag gives you deeper, narrower penetration because the arc force is concentrated right into the joint. Push spreads the heat wider and shallower. On 1/4-inch plate or thicker, that shallow penetration is the difference between a weld that holds and one that cracks under load.
Slag Control
Drag keeps the slag where it belongs—on top. Push mixes it in. I’ve chipped out slag inclusions the size of pencil erasers from pushed 6010 root passes. The welder swore he “could see better.” The customer didn’t care when the repair bill came.
Distortion and Heat Input
Dragging lets you run slightly higher travel speeds on many joints, which means less overall heat. Less heat, less warping on thin stuff like 11-gauge trailer fenders or 3/16-inch truck frame patches.
Rod Burn-Off and Cost
When you drag correctly, the coating burns evenly. Push too much and you get “fingernailing”—the coating burns off one side faster, leaving a long, useless stub. I’ve watched apprentices waste half a rod that way. At $3–$4 a pound for 7018, that adds up fast.
Rework
This is the real killer. A bad stick weld doesn’t just look ugly. It often means grinding, preheating again, and running new beads. On a Saturday afternoon when you’re trying to finish a gate before the rain hits, that extra hour hurts.
When You Can (and Sometimes Should) Push the Rod
I’m not a rules-are-rules guy. There are real-world exceptions.
Vertical-Up Welding
Here’s where the books and the shop floor sometimes disagree a little. For vertical-up, most manufacturers recommend a slight push angle—5 to 15 degrees with the rod pointing slightly uphill. Why? Gravity wants to pull that puddle down into your boots. A light push helps you control the pool and keep it from sagging.
I still drag on most vertical-up fillets, but I’ll push the root pass on open-root pipe if the fit-up is ugly. The key is keeping the angle shallow. Push too hard and you’re back to slag city.
Certain Rods and Positions
6010 and 6011: These “digging” rods are more forgiving. You can push them a little more than 7018, especially on dirty steel. But I still default to drag.
Overhead: Pure drag. No exceptions. Push overhead and the slag falls right into your face shield.
Horizontal: Drag, but watch the angle. Too much drag and the bead will roll down. Too little and you get undercut on the top toe.
Learn to drag first. Once you can run perfect drag beads in every position, then experiment. But 95% of the time, drag wins.
The Right Electrode Angle: 5–15 Degrees Is Your Sweet Spot
Hold the rod perpendicular to the plate, then tilt the top back 5–15 degrees in the direction of travel. That’s the classic drag angle.
- Too flat (0–5 degrees): Slag rolls into the puddle.
- Too much drag (20+ degrees): You get “fingernailing” on low-hydrogen rods and poor tie-in on the toes.
- Watch the puddle, not the rod. The leading edge of the pool should stay about 1/16–1/8 inch ahead of the arc.
I tell my guys: “The rod should look like it’s leaning back, whispering secrets to the weld you just made.”
Choosing Rods That Match Your Technique
Different rods behave differently, and the right choice can make dragging feel effortless.
E6010 / E6011
Cellulosic coating. Deep penetration, fast-freeze puddle. Great for root passes and dirty steel. Drag them hard—they love it. I run these at higher amps (90–140 for 1/8″) and move quick.
E6013
Easy arc, light slag, great for thin material and beginners. Drag at a slightly steeper angle. These are the “forgiving” rods that got a lot of us through our first year.
E7018
Low-hydrogen king. Thick slag blanket. Drag at 10–12 degrees and keep a tight arc. These rods hate being pushed. I preheat to 200–300°F on anything over 1/2-inch thick when running 7018.
E7024
High-deposition, iron powder rod. Drag these almost flat—5 degrees max. They run like butter on flat and horizontal fillets.
Pro Tip from the Shop
Keep a few 3/32-inch 7018s in your rod oven for root passes on thick plate. The smaller diameter lets you drag tighter and get better control without burning through.
Amperage Ranges That Actually Work (USA Machines)
Here’s what I set on my machines. These are real-world numbers from a Miller 350 and a Lincoln 225, not the chart on the rod box.
| Electrode | Diameter | Flat/Horizontal Amps | Vertical Amps | Overhead Amps | Polarity |
|---|---|---|---|---|---|
| E6010/11 | 3/32″ | 60–90 | 55–80 | 55–75 | DCEP |
| E6010/11 | 1/8″ | 90–130 | 80–115 | 75–110 | DCEP |
| E6013 | 1/8″ | 100–140 | 90–120 | 85–115 | AC or DCEP |
| E7018 | 3/32″ | 70–100 | 65–90 | 60–85 | DCEP |
| E7018 | 1/8″ | 110–150 | 100–135 | 95–130 | DCEP |
| E7024 | 1/8″ | 130–180 | 120–160 | 115–155 | AC or DCEP |
Start in the middle of the range. Watch the puddle. If it’s too fluid and you’re getting undercut, drop 5–10 amps. If the rod sticks or the arc sounds like bacon frying, bump it up.
Joint Preparation: The Part Nobody Wants to Do (But Everyone Should)
Clean metal is 70% of a good weld.
- Grind or wire-wheel 1/2 inch back from the joint.
- Remove mill scale, rust, paint, oil—everything.
- On thick plate, bevel to 30–35 degrees with a 1/16–3/32 root face.
- Leave a 1/16-inch gap on butt joints for 7018.
- Tack every 4–6 inches and peen them while hot.
I’ve seen guys spend $200 on fancy rods and then weld over primer. Don’t be that guy.
Position-Specific Drags That Actually Work
Flat
Easiest. Drag at 10 degrees, stringer beads. Watch the toes.
Horizontal
Slightly steeper drag (12–15 degrees) to keep the puddle from rolling down. Pause at the top toe.
Vertical Up
Light push or neutral angle. Use a slight weave. Pause at the sides for tie-in. Run 10% lower amps than flat.
Overhead
Tight drag, small puddle, fast travel. 6010 or 6011 roots, 7018 caps. Keep your body under the joint so slag falls away from you.
My Go-To Practice Drills That Actually Build Muscle Memory
The Straight-Line Drill – 12-inch beads on 1/4-inch plate. No weaving. Just drag and keep the arc in the front third of the puddle.
The Toe-Touch – Run a bead, stop, restart 1/4 inch ahead of the crater, and tie in perfectly. Do this 20 times.
The Ugly Joint Drill – Weld over a deliberately dirty, gapped joint with 6010. Then run 7018 over it. Learn to make bad metal look good.
Do these with your helmet down. No peeking until the bead is done.
Common Mistakes I Still See (And How to Fix Them)
Mistake: Pushing because “I can see better.”
Fix: Tilt your head, not the rod. Drag at 10 degrees and you’ll see plenty.
Mistake: Running the rod too vertical.
Fix: The rod should point back at the weld you just made.
Mistake: Amperage too high on 7018.
Fix: Drop it until the slag stays fluid but doesn’t run ahead of the arc.
Mistake: Long arc on restarts.
Fix: Scratch start 1/4 inch ahead, then immediately drop to tight arc.
The One Thing That Separates Good Welders from Great Ones
Consistency. The best welders I know don’t chase perfect beads every time. They chase repeatable ones. Same angle. Same arc length. Same travel speed. When something goes wrong, they know exactly what changed.
You’re Ready to Drag Like a Pro
Next time you fire up the machine, remember this: the rod wants to be dragged. The slag wants to ride behind. Your welds want to be clean, strong, and fast. Do that, and you’ll spend less time grinding and more time building things that last.
Now go burn some rod. And when someone asks you, “Do you push or pull stick welding?” you can smile and say, “I drag it like the old guys taught me—because it just works.”
FAQ: Real Questions from Real Welders
Can I push stick welding if I’m welding vertical up?
Yes, but keep the angle shallow—5 to 10 degrees push max. Any more and you’ll trap slag. I still prefer a neutral-to-light drag on most vertical fillets unless the puddle starts sagging.
What’s the best rod angle for 7018?
10–12 degrees drag in flat and horizontal. Keep the arc tight—about the diameter of the rod core. If you see the coating burning unevenly on one side, you’re angled too much.
How do I know if my amperage is too high?
The puddle gets too fluid, the arc sounds harsh, and you start getting undercut on the toes. Drop 10 amps and try again. Better to run a little cold and add another pass than to burn through.
Do different machines change whether I should push or pull?
No. The physics of slag doesn’t care if you’re on a $300 inverter or a 600-amp engine drive. Drag is drag.
I keep getting slag inclusions no matter what. What am I doing wrong?
99% of the time it’s one of three things: pushing instead of dragging, arc too long, or dirty metal. Clean the joint, shorten the arc, and drag the rod. Fixed 90% of my apprentices’ problems with that combo.

Hi, I’m Zachary Ford. I’m passionate about welding and dedicated to helping both beginners and experienced welders make informed decisions. I research, test, and write about welding helmets, welding machines, safety equipment, and essential workshop tools. My goal is to provide honest reviews, practical buying guides, and easy-to-follow tutorials that help you weld more safely, work more efficiently, and choose the right gear with confidence.