Setting up a welder correctly is critical to achieving stable arc performance, proper penetration, and clean weld beads. When learning how to set up a gasless MIG welder , small configuration mistakes—like incorrect polarity, improper wire feed speed, or mismatched voltage—can lead to spatter, weak fusion, and costly rework.
Unlike gas-shielded systems, gasless (flux-cored) MIG welding relies on precise setup to maintain arc stability and protect the weld pool without external shielding gas.
This matters in real-world fabrication because poor setup directly impacts weld strength, increases defect rates, and can fail inspection standards. Whether you’re working on structural steel, automotive repair, or light fabrication, dialing in the correct settings ensures efficiency and consistent results.
A proper understanding of setup fundamentals allows you to minimize defects, control heat input, and produce reliable welds across varying material thicknesses and positions.
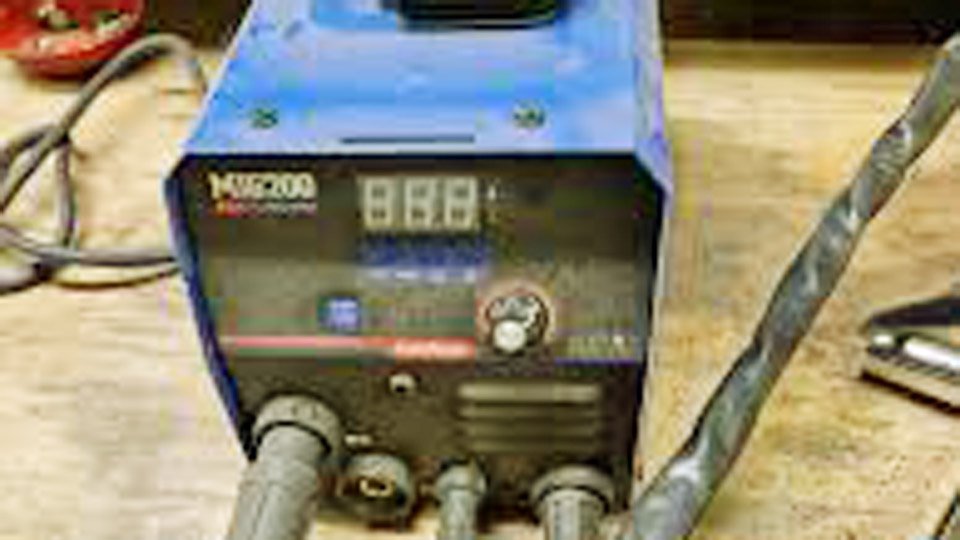
Image by UK Welding & Fabrication Network
Selecting Flux-Cored Wire Diameter and Classification for Your Application
Wire choice dictates every downstream setting. Self-shielded flux core is softer than solid wire and contains flux that generates its own shielding, so diameter and AWS classification directly control deposition rate, slag volume, and arc stability.
Matching Wire Size to Material Thickness and Welder Output
Use 0.030-inch wire for 16 gauge to 3/16-inch material on machines rated 140–200 amps. It runs cooler, produces a manageable slag blanket, and avoids burn-through on thin sections.
Move to 0.035-inch wire above 3/16 inch or when your welder exceeds 200 amps; the larger diameter carries more current and gives deeper penetration on ¼-inch and thicker plate without multiple passes. Reserve 0.045-inch for structural work over ⅜ inch where maximum deposition is required and your machine can sustain 250+ amps.
Self-Shielded Classifications: E71T-GS vs E71T-11 Performance Differences
E71T-GS wires (Forney 42300, Blue Demon, INETUB BA71T-GS) are general-purpose, all-position wires with fast-freezing slag suited to single-pass repairs and thin-to-medium plate. They tolerate light surface rust better but produce slightly more spatter at higher voltages.
E71T-11 wires (Hobart Fabshield 21B, Lincoln Innershield NR-211MP) offer superior low-temperature toughness and crack resistance, making them the choice for structural or multi-pass work.
The -11 classification also runs smoother at higher travel speeds and leaves easier-to-remove slag on thicker sections. Both are rated for DCEN only—never run them on DCEP.
Top-Rated Wires for Consistent Gasless Performance
Current field data shows Hobart Fabshield 21B and Lincoln NR-211MP deliver the lowest porosity rates when base metal has moderate mill scale. For budget setups, Forney 42300 and PGN E71T-11 hold stable arcs down to 15 V without excessive spatter. Buy 2-lb or 10-lb spools to match your usage; larger 33-lb spools increase hub tension requirements and risk bird-nesting if your feeder is marginal.
Establishing Correct Polarity and Power Connections
Polarity is the single most common setup error in gasless MIG. Self-shielded wires require electron flow from the wire to the workpiece for proper flux activation and arc force.
DCEN Configuration – Why It’s Non-Negotiable for Self-Shielded Wire
Connect the torch lead to the negative terminal and the work clamp (earth) to the positive terminal—straight polarity or DC electrode negative. This concentrates heat at the workpiece for deeper penetration and keeps the flux core from overheating and spitting.
Running DCEP (the default for gas MIG) reverses the arc force, flattens the bead, and produces extreme spatter because the flux decomposes too early in the arc column. Most machines label the internal polarity block clearly; swap the short jumper lead or quick-connect plug to the negative socket for the gun side.
Verifying and Switching Polarity on Common Welder Models
On YesWelder, HZXVOGEN, and ARCCAPTAIN inverters, the polarity block sits inside the wire compartment—unplug the machine, open the side panel, and move the lead from + to – on the torch side.
Miller Millermatic and Lincoln Power MIG units use a front-panel DINSE-style connector or internal bus bar; confirm with a test arc on scrap—the arc should sound crisp and the bead should sit flat with minimal undercut only on DCEN. If your machine lacks polarity switching, it cannot run self-shielded flux core reliably.
Installing Wire, Drive Rolls, and Contact Tip
Flux-cored wire is tubular and crushes easily, so hardware choices prevent feeding problems before you ever strike an arc.
Choosing and Installing Knurled Drive Rolls
Install knurled (serrated) V-groove or U-groove rolls sized exactly to your wire diameter—0.030-inch rolls for 0.030 wire, 0.035-inch for 0.035 wire. Smooth rolls designed for solid wire will slip or deform the flux core, causing bird-nesting.
Torque the drive roll pressure just enough to feed wire without slipping when you pull the gun trigger with the tip removed; one extra half-turn after initial contact is the practical limit.
Wire Tension and Spool Hub Adjustments for Smooth Feeding
Set spool hub tension so the spool stops within one revolution after you release the trigger—too tight creates drag and erratic feed speed, too loose lets the spool overrun and tangle.
Thread the wire through a clean liner (Teflon or steel, matching diameter) and trim the liner flush or ⅛ inch short of the contact tip to prevent jamming. Inspect for burrs every spool change.
Contact Tip Selection and Recess Settings
Choose a contact tip 0.005–0.010 inch larger than wire diameter (0.035-inch tip for 0.030-inch wire is standard and reduces burn-back). Recess the tip ⅛ inch inside the nozzle for most flat and horizontal work; flush or slight protrusion helps on vertical-up passes. Replace the tip every 2–3 pounds of wire or at the first sign of arcing inside the tip bore.
Setting Voltage, Wire Feed Speed, and Stickout Length
Voltage controls arc length and bead width; wire feed speed (WFS) controls amperage and deposition. Stickout length is the third variable that fine-tunes heat input in gasless MIG.
Using Machine Charts and Real-World Starting Points
Always begin with the manufacturer’s built-in chart or Miller’s online flux-cored calculator, then adjust ±1 V and ±20 IPM on test coupons. Gasless setups run hotter than gas MIG because the flux adds resistance—expect 1–2 V higher than solid-wire charts for the same thickness.
Sample Parameter Tables for Common Thicknesses
Use these starting points for 0.030-inch and 0.035-inch E71T-11 wire on clean mild steel in flat position (DCEN, ¾-inch stickout):
| Thickness | Wire Size | Voltage (V) | Wire Feed Speed (IPM) | Approx. Amps | Travel Speed (IPM) |
|---|---|---|---|---|---|
| 16 ga – ⅛ in | 0.030″ | 17–20 | 220–320 | 90–140 | 10–14 |
| ⅛ – ¼ in | 0.030″ | 19–22 | 300–420 | 130–180 | 8–12 |
| ¼ – ⅜ in | 0.035″ | 21–24 | 280–400 | 160–220 | 6–10 |
| ⅜ in + | 0.035″ | 23–26 | 350–500 | 200–280 | 5–8 |
Reduce voltage 1–2 V and WFS 15–20 % for vertical or overhead to control the puddle. Increase travel speed to avoid excessive convexity.
Preparing the Workpiece and Ground Connection for Reliable Arcs
Grind or wire-brush mill scale, rust, and paint within ½ inch of the joint line—flux core tolerates more contamination than gas MIG but still suffers porosity if grease or moisture remains.
Position the ground clamp on clean metal as close to the weld zone as possible; resistance in the clamp connection drops actual arc voltage by 1–2 V and destabilizes the pool. Use a 300-amp clamp with at least 10 feet of #2 cable for machines over 200 amps.
Executing Test Welds to Validate Setup Parameters
Strike the arc on scrap of the same thickness and joint type. Maintain a ¾-inch stickout measured from the contact tip to the workpiece (not including arc length). Pull the gun at a 10–15° drag angle—leading the puddle with the gun produces slag inclusions in flux core.
Listen for a steady frying-bacon sound; a popping or spitting arc means voltage is too low or stickout too long. Run 6-inch beads, break them, and inspect root fusion and slag release. Adjust voltage first in ½-V increments, then WFS if penetration is insufficient.
Diagnosing and Correcting Setup-Induced Defects
Addressing Excessive Spatter Through Parameter Tweaks
Spatter above normal levels almost always traces to voltage too high for the WFS or stickout under ⅝ inch. Drop voltage ½ V and increase stickout to ¾–1 inch; this lengthens the arc column and lets the flux do its deoxidizing job before the droplet detaches.
Eliminating Porosity with Stickout and Cleanliness Controls
Porosity appears as small holes or worm tracks when gas pockets from the flux fail to escape. Extend stickout to the full 1¼-inch maximum only if voltage is already optimized—longer than that cools the arc and traps gas. Re-clean the joint if porosity persists; deoxidizers in E71T-11 cannot overcome heavy oil or moisture.
Fixing Worm Tracks and Slag Inclusions
Worm tracks (longitudinal grooves in the bead face) signal voltage too high for the travel speed. Reduce voltage ½–1 V until the bead face smooths. Slag inclusions on multi-pass work result from insufficient heat or incorrect bead placement—overlap each pass by 50 % and maintain the 15–45° drag angle to keep the slag behind the puddle.
Adapting Setup for Out-of-Position Welding and Thicker Materials
Vertical-up requires the smallest feasible wire (0.030-inch), 10–15 % lower voltage, and a tight 5–15° drag angle with a slight weave pause at the toes. Overhead demands the same reduction plus faster travel to prevent slag runoff.
On material thicker than ⅜ inch, bevel edges to 30–35° included angle and use stringer beads at the parameters listed above; the self-shielded process allows single-pass fillets up to ¼ inch leg size on ½-inch plate when voltage and WFS stay in the upper range.
Final Thoughts
Proper setup turns gasless MIG from a spatter-prone compromise into the preferred process for outdoor fabrication, farm repairs, and structural work where gas is impractical. The key decisions—DCEN polarity, knurled rolls, ¾-inch stickout, and voltage tuned to the exact wire-feed rate—directly determine deposition efficiency and mechanical properties.
Master these once and you gain the ability to lay 20–30 % more weld metal per hour than gas MIG in windy conditions, with penetration that rivals 7018 stick electrodes on dirty plate. The next time you face a ¼-inch butt joint in a 15-mph breeze, the difference is measurable in bead profile and radiographic quality.