Setting the correct parameters on a MIG welder directly controls weld quality, consistency, and structural integrity. Understanding How to Set Voltage and Wire Speed on MIG Welder is essential because these two variables determine heat input and filler metal deposition.
If voltage is too low, the arc becomes unstable and produces poor fusion; too high, and you risk excessive spatter, burn-through, or distortion. Likewise, incorrect wire speed leads to amperage mismatch, causing weak penetration or erratic arc behavior.
In real fabrication work, these issues translate into failed inspections, costly rework, and wasted material. Proper adjustment ensures a stable arc, controlled bead profile, and reliable penetration across different metal thicknesses and positions.
This guide focuses on how voltage and wire speed interact, why they must be balanced, and how to fine-tune settings for consistent, high-quality welds in practical shop conditions.
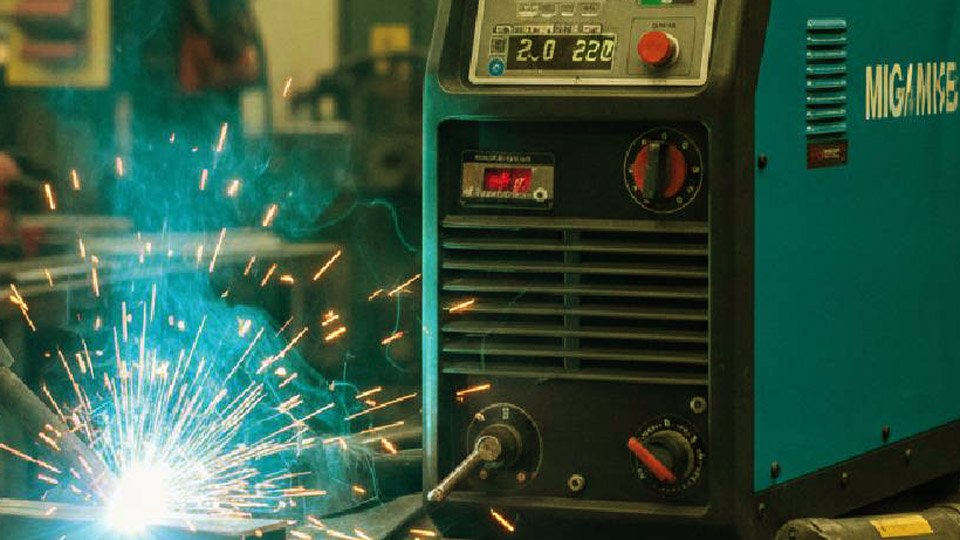
Image by yeswelder
How Voltage and Wire Speed Actually Work Together in MIG Welding
Voltage and wire speed are not independent dials—they interact constantly. Change one without adjusting the other and the arc becomes unstable. Understanding their separate roles eliminates 90 percent of bad settings.
Voltage’s Role in Arc Length and Bead Profile
Voltage controls the distance between the wire tip and the weld pool. Higher voltage stretches the arc, producing a wider, flatter bead with shallower penetration. Lower voltage shortens the arc, creating a narrower, more convex bead with deeper penetration but higher risk of stubbing.
On most machines, a 0.5-volt change is noticeable; a full volt shift dramatically alters bead shape. Voltage does not directly set heat input—wire speed does that—but it determines how efficiently that heat transfers into the base metal.
Why Wire Speed Dictates Your Amperage Output
Wire speed (measured in inches per minute, or IPM) pushes more filler metal into the arc per second, which directly raises amperage. More wire equals more current equals more heat and faster deposition. On a typical 0.030-inch wire, every 50 IPM increase adds roughly 25 amps.
This is why professionals always set wire speed first based on material thickness, then match voltage to it. Running wire speed too high for the chosen voltage causes the wire to stub into the pool. Too low and the arc burns back to the contact tip.
How to Calculate Your Starting Voltage and Wire Speed Settings
Skip manufacturer charts at your peril. The fastest path to dialed-in settings starts with two simple rules used on job sites and in shops worldwide.
The Material Thickness Rule for Amperage
For mild steel, use 1 amp per 0.001 inch of material thickness as your baseline. A 1/8-inch (0.125″) plate needs roughly 125 amps. Stainless steel requires 10-15% less current to avoid distortion. Aluminum needs about 25% more because it conducts heat faster. This rule gives you a target amperage range before you touch any knobs.
Wire Diameter Multipliers for Initial Wire Feed Speed
Once you know target amperage, multiply by the correct factor for your wire size to get starting IPM. These multipliers come from MillerWelds engineering data and work across most constant-voltage machines.
| Wire Size | Multiplier (ipm per amp) | Example at 125 amps (1/8″ steel) |
|---|---|---|
| 0.023″ | 3.5 | 437 ipm |
| 0.030″ | 2.0 | 250 ipm |
| 0.035″ | 1.6 | 200 ipm |
| 0.045″ | 1.0 | 125 ipm |
Start in the middle of the calculated range, then test on scrap. These numbers assume 75/25 argon/CO₂ gas and DCEP polarity for solid wire.
Ready-to-Use Voltage and Wire Speed Charts by Material
Charts get you 80% of the way there. The remaining 20% comes from test welds and fine-tuning. All values below assume short-circuit transfer unless noted, 3/8–1/2 inch stickout, and clean metal.
Mild Steel Solid Wire Settings (ER70S-6, 75/25 Argon-CO₂)
| Thickness | Wire Size | Voltage (V) | Wire Speed (IPM) | Typical Amps |
|---|---|---|---|---|
| 1 mm (20 ga) | 0.023″ | 15–16 | 90–120 | 40–60 |
| 2 mm (18 ga) | 0.023″ | 16–17 | 120–150 | 60–90 |
| 3 mm (1/8″) | 0.030″ | 17–18 | 150–180 | 90–120 |
| 5 mm (3/16″) | 0.030″ | 18–19 | 180–220 | 120–150 |
| 6 mm (1/4″) | 0.035″ | 19–21 | 220–260 | 150–180 |
For 100% CO₂, add 1–2 volts to maintain arc stability.
Flux-Cored Wire Settings (Self-Shielded, DCEN Polarity)
| Thickness | Wire Size | Voltage (V) | Wire Speed (IPM) |
|---|---|---|---|
| 2 mm | 0.030″ | 16–17 | 130–160 |
| 3 mm (1/8″) | 0.030″ | 17–18 | 160–200 |
| 5 mm | 0.035″ | 18–20 | 200–240 |
| 6 mm (1/4″) | 0.035″ | 19–21 | 230–280 |
Flux-cored runs hotter and tolerates wind better, but requires slightly higher voltage than solid wire for the same thickness.
Aluminum MIG Parameters (ER4043 or ER5356, 100% Argon)
Aluminum demands higher wire speeds and pure argon because of its high thermal conductivity. Use a spool gun or push-pull system to prevent feeding jams.
| Thickness | Wire Size | Voltage (V) | Wire Speed (IPM) |
|---|---|---|---|
| 2 mm | 0.030″ | 17–19 | 200–300 |
| 3–4 mm | 0.035″ | 19–21 | 250–350 |
| 1/8″ (3 mm) | 0.035″ | 21–23 | 450–600 (spray) |
Push technique, 15–20° forehand angle, and slightly longer stickout (up to 5/8″) prevent oxide inclusions.
Stainless Steel MIG (ER308/ER316, Tri-Mix or 98% Ar/2% CO₂)
Lower heat input prevents carbide precipitation and distortion.
| Thickness | Wire Size | Voltage (V) | Wire Speed (IPM) |
|---|---|---|---|
| 1–2 mm | 0.023″ | 15–17 | 90–140 |
| 3–4 mm | 0.030″ | 17–19 | 150–200 |
| Thicker | 0.035″ | 18–20 | 250–350 |
Back-purge when possible and keep interpass temperatures below 350°F.
The Practical Dial-In Process for Voltage and Wire Speed
Follow this sequence on every new job. It takes under two minutes once you’re practiced.
Test Piece Preparation and Machine Setup
Cut a scrap piece of the exact same thickness, material, and joint type. Clean to bright metal. Set gas flow to 20–25 CFH indoors (increase 5 CFH outdoors). Use 3/8–1/2 inch stickout. Set polarity to DCEP for solid wire, DCEN for most flux-cored.
Establishing Baseline Wire Speed
Calculate or look up the IPM target from the charts above. Set wire speed first. Trigger the gun on scrap without arcing and confirm the wire feeds smoothly.
Tuning Voltage for the Perfect Arc Sound
Strike the arc. Listen: a smooth “bacon frying” or light crackle means correct settings. Popping or machine-gun stuttering? Increase voltage 0.5 V. Hissing or arc wandering? Decrease voltage.
Watch the puddle: it should be fluid with good wetting at the toes. Adjust in 0.5-volt or 10-IPM increments only—never change both at once. Make a 3-inch bead, stop, inspect, then tweak.
How Shielding Gas and Electrode Stickout Change Your Optimal Settings
Shielding gas composition shifts voltage needs by up to 2 volts. 75/25 argon/CO₂ runs cooler and smoother than 100% CO₂, so you drop voltage slightly for the same wire speed. Pure argon for aluminum requires higher voltage to maintain spray transfer.
Stickout length adds resistance. Every extra 1/4 inch beyond 1/2 inch effectively lowers your voltage by about 0.5–1 V. Keep it consistent or compensate by raising voltage when you notice the arc shortening.
Diagnosing and Correcting Bad Welds Through Settings Adjustments
Bead appearance is your real-time feedback system.
Bead Appearance Tells You Exactly What to Change
- Convex, ropey bead with poor tie-in → Increase voltage or wire speed.
- Flat or concave bead with undercut → Decrease voltage.
- Excessive spatter and popping → Voltage too low for wire speed; raise voltage first.
- Stubbing or wire jamming into pool → Voltage too low; increase 0.5–1 V.
- Burn-through or wide, turbulent puddle → Wire speed too high; reduce IPM.
- Arc too long and erratic → Voltage too high.
Common Voltage and Wire Speed Mismatches and Fixes
If penetration is shallow on thick material, raise wire speed 20–30 IPM then match voltage. On thin material, drop both settings together to stay out of burn-through territory. Vertical or overhead? Reduce wire speed 10–15% and voltage 1 V for better puddle control.
Handling Synergic and Auto-Set MIG Welders
Modern inverter machines with synergic programs calculate voltage and wire speed together from material thickness input. They are excellent starting points. Override when:
- Welding out-of-position (manual usually gives tighter puddle control).
- Using non-standard gas or wire.
- Needing maximum travel speed on production work.
Enter the thickness, let the machine suggest settings, then fine-tune voltage ±1 V while watching the puddle. The best welders treat synergic as a baseline, not a crutch.
Final Thoughts
Mastering how to set voltage and wire speed on MIG welder turns every machine into a precision tool. The decision is simple: calculate amperage from thickness, pick wire size, set speed first, then match voltage to the arc. Test, listen, inspect, adjust once.
In the field or the shop, the welders who produce X-ray quality beads fastest are the ones who treat voltage and wire speed as a single calibrated system rather than two separate knobs.
Once you internalize these relationships, move to pulse MIG on thin materials—the machine handles the micro-adjustments and you’ll achieve spatter-free results that manual short-circuit could never match.
FAQ
What voltage should I run for 1/8-inch mild steel on a MIG welder?
Start at 17–18 V with 0.030″ wire at 150–180 IPM (75/25 gas). Fine-tune until you hear the bacon-frying sound and the bead wets out evenly.
Does changing wire speed affect penetration more than voltage?
Yes. Wire speed controls amperage and deposition rate directly. Voltage mainly shapes the arc and bead profile. Always adjust wire speed first for heat input needs.
How do I set voltage and wire speed for flux core wire without gas?
Use DCEN polarity. For 1/8-inch steel with 0.030″ flux core, begin at 17–18 V and 160–200 IPM. Expect slightly higher voltage than solid wire to compensate for the slag system.
Why does my aluminum weld keep burning through even at low settings?
Aluminum requires higher wire speed (200–350+ IPM) but you must drop voltage and use pure argon. Switch to a spool gun and push technique; the high conductivity means settings that work on steel will overheat aluminum instantly.