Your MIG welder isn’t working right when you need it most—no arc strikes despite the trigger pull, wire stops feeding halfway through a bead, or the arc sputters with heavy spatter and porosity. These failures trace directly to mismatched voltage, clogged liners, incorrect gas flow, or worn contact tips that disrupt consistent short-circuit or spray transfer on steel.
For DIYers, hobbyists, and pros welding 1/16-inch to 1/4-inch material, the difference between a failed joint and a clean penetration bead comes down to precise parameter checks and consumable inspection. Addressing these root causes restores reliable arc initiation and bead profile without guesswork or repeated restarts.
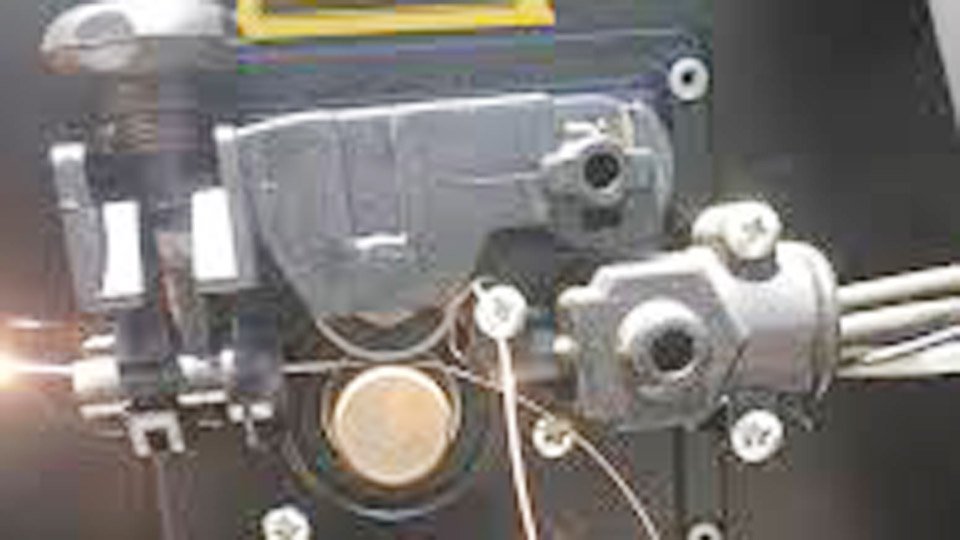
Image by reddit
Electrical and Power Supply Failures Preventing Arc Initiation
Power delivery problems stop the arc before wire even reaches the workpiece. Voltage drop or poor grounding kills the circuit even when the machine powers on and the wire feeds.
Verifying Input Voltage and Circuit Breaker Capacity
Measure incoming voltage at the receptacle with a multimeter under load—expect 220–240 V on 230 V machines or 110–120 V on 115 V units. A 5–10 % drop from extension cords (especially 14-gauge or longer runs) reduces output amperage enough to prevent arc start.
Dedicated 30–50 A breakers prevent nuisance trips; shared household circuits with other tools cause intermittent shutdowns. Replace undersized cords with 10-gauge or shorter runs for machines above 180 A.
Ground Clamp and Workpiece Connection Integrity
Clean the clamp jaws and workpiece contact area to bright metal—rust or paint creates resistance that drops effective voltage at the arc by 2–4 V. Test continuity from clamp to gun nozzle with the machine off; resistance above 0.5 ohms indicates corrosion or loose cable strands. Reposition the clamp closer to the weld zone on long fabrications to minimize voltage drop along the workpiece.
Internal Transformer or Inverter Fault Indicators
Overheating or tripped thermal switches shut down output without tripping the main breaker. Listen for the cooling fan; absence of fan noise or visible error LEDs (on inverter models) points to rectifier diode failure or capacitor issues.
Reset only after full cooldown—repeated thermal trips signal duty cycle exceedance or restricted airflow from dust buildup inside the cabinet.
Wire Feeding Malfunctions – The Most Common MIG Welder Breakdown
Wire feed failures account for the majority of downtime. Erratic or zero feed creates birdnesting at the drive rolls or burn-back into the contact tip.
Drive Roll Tension and Groove Alignment Checks
Set tension so the wire stops feeding when you pinch it lightly between thumb and forefinger while the motor runs—too loose causes slip and inconsistent amperage; too tight deforms the wire and creates shavings that clog the liner.
Match groove size exactly to wire diameter (.030-inch rolls for .030 wire). Misaligned inlet and outlet guides force the wire to scrape, accelerating wear and erratic speed. Clean grooves with a wire brush every 5–10 pounds of wire consumed.
Liner Contamination and Replacement Criteria
Steel dust, copper flakes, and lubricant residue inside the liner create drag that spikes motor load and stops feed. Blow out the liner from the contact tip end with dry compressed air (no solvents). Replace when the wire drags noticeably or after 200–300 hours of use, or immediately if kinked. Use Teflon liners for aluminum to eliminate steel-specific abrasion.
Spool Brake Tension and Wire Tangling Prevention
Adjust spool brake so the spool coasts no more than one revolution after trigger release—excessive freewheeling causes overrun and birdnesting at the drive rolls. Too-tight brake increases motor current draw and risks wire breakage. Inspect spool hub for burrs and ensure the wire unwinds straight into the inlet guide without side loading.
Contact Tip and Diffuser Wear Assessment
A worn contact tip enlarges the bore and allows the wire to wander, causing arc wander and inconsistent amperage. Replace when the bore measures 0.005-inch oversized or shows an egg-shaped wear pattern. Maintain 1/8-inch recess inside the nozzle for optimal gas coverage; excessive stickout beyond 1/2 inch drops effective voltage and increases spatter.
Shielding Gas Delivery Problems Leading to Arc Instability
Inadequate or turbulent gas flow contaminates the weld pool even when the arc strikes, producing porosity visible on the bead surface or subsurface.
Regulator Flow Rate Calibration (Target 30-40 CFH)
Use a dedicated flow meter (not pressure gauge) at the gun nozzle—30–40 cubic feet per hour delivers stable coverage for most steel applications. CO₂ mixes require slightly higher settings due to denser gas.
Test flow with the trigger held and gun 6 inches from a surface; bubbles in a water test confirm leaks. Drafts above 5 mph or overhead ventilation suck air into the pool—erect wind screens or reposition fans.
Hose and Solenoid Leak Detection Methods
Pressurize the system with the machine off and listen for hissing or apply soapy water to fittings. Cracked hoses or failed solenoid valves (clicking sound absent when trigger pulled) allow air ingress. Replace solenoids showing intermittent operation; they control gas pre-flow and post-flow timing critical for crater fill.
Gas Type Selection for Steel vs. Aluminum
75 % argon / 25 % CO₂ (C25) provides stable short-circuit transfer on mild steel; pure argon causes erratic arc on steel but is mandatory for aluminum to prevent oxidation. Never interchange cylinders—wrong gas instantly creates porosity and black soot. Store cylinders upright and use regulators rated for the specific gas to avoid frosting and pressure loss.
Incorrect Voltage and Wire Speed Settings Causing No Arc or Poor Welds
Parameters must match material thickness and wire diameter exactly. Wrong settings produce either no arc or unstable transfer that mimics a “dead” machine.
Calculating Amperage from Material Thickness
Apply the 1 amp per 0.001-inch rule: 1/8-inch (0.125-inch) steel requires approximately 125 A. Thinner material (16 gauge ≈ 0.060-inch) drops to 60 A; thicker 3/16-inch steel needs 180–200 A. Exceeding this risks burn-through; falling short prevents fusion.
Wire Feed Speed Multipliers and Starting Points
Wire feed speed directly controls amperage output. Use these multipliers for initial settings on steel:
| Wire Size | Multiplier (ipm per amp) | Example at 125 A (1/8-inch steel) |
|---|---|---|
| .023 inch | 3.5 | 437.5 ipm |
| .030 inch | 2.0 | 250 ipm |
| .035 inch | 1.6 | 200 ipm |
| .045 inch | 1.0 | 125 ipm |
Fine-tune by observing arc stability rather than dial markings alone.
Voltage Adjustment by Arc Sound and Bead Profile
Set voltage after wire speed. Listen for a crisp, steady buzz (short-circuit) or crackle (spray transfer). Low voltage produces a raspy sound, excessive spatter, and convex beads with poor toe tie-in. High voltage creates a hiss, undercut, and turbulent pool.
Increase voltage 1–2 V if the wire stubs; decrease if the arc climbs the wire. Travel speed must keep the arc on the leading edge of the puddle—too slow causes burn-through on thin stock; too fast leaves narrow, under-penetrated beads.
Weld Quality Defects When Parameters Drift
Even when the arc strikes, drifting settings create defects that require rework.
Diagnosing Excessive Spatter and Porosity
Spatter surges when voltage sits 2–3 V too low or gas flow drops below 25 CFH. Clean base metal removes oil and mill scale that outgas under the arc. Porosity appears as round holes or subsurface voids—trace to drafts, contaminated wire, or wire stickout exceeding 1/2 inch. Increase gas flow and shorten stickout first; then raise voltage until spatter disappears while maintaining bead width.
Lack of Penetration and Cold Lap Fixes
Cold lap (lack of fusion at toes) occurs with voltage too low for the travel speed or when using short-circuit transfer on thicker material. Increase voltage or switch to spray transfer (24 V+ and higher wire speed) for thicker sections.
Maintain 0–15° push angle and keep the arc on the leading puddle edge. Test fusion with a bend or dye-penetrant inspection on critical joints.
Machine Overheating and Automatic Shutdowns
Thermal overloads halt operation mid-bead on production runs.
Duty Cycle Monitoring and Cooling Requirements
Most 200 A machines deliver 100 % duty cycle at 100–140 A but only 20–40 % at maximum output. Exceeding rated duty cycle (e.g., welding continuously above 150 A on a 30 % machine) triggers shutdown. Allow 5–10 minutes cooldown between high-amperage runs; clear cabinet vents of dust for unrestricted airflow.
Extension Cord Gauge and Voltage Drop Avoidance
Long or undersized cords drop voltage at the machine, forcing higher internal current draw and heat buildup. Use 10 AWG or heavier for runs over 50 feet on 230 V machines. Measure voltage at the welder input while welding—any drop below nameplate rating reduces output and increases thermal stress.
Advanced Diagnostics for Persistent MIG Welder Issues
When basic checks fail, isolate electrical and mechanical paths systematically.
Trigger Switch and Gun Cable Continuity Testing
Remove the gun cable and test trigger continuity with a multimeter—closed circuit should read near zero ohms. Broken strands inside the gun cable create intermittent feed and arc. Replace the entire cable assembly if resistance exceeds 1 ohm or if the trigger sticks.
When to Replace Consumables or Call Service
Replace drive rolls, liners, and tips every 100–200 pounds of wire or at first sign of groove wear or erratic feed. Persistent no-arc conditions after confirming input power and ground point to internal rectifier or control board faults—only qualified technicians should open the machine to avoid voiding warranty or shock hazard.
Real-world decision framework for reliable MIG performance
Match amperage to thickness first (1 A per 0.001 inch), then lock wire speed with the multiplier chart, and fine-tune voltage by arc sound and bead profile. Gas flow at 30–40 CFH, clean consumables, and proper stickout eliminate 90 % of downtime.
The advanced pro insight: once short-circuit transfer limits appear on material above 3/16 inch, transition to spray arc at 24–26 V and 300+ ipm wire speed for deeper penetration and zero spatter—provided your machine and gas mix support true spray without pulsed equipment. These calibrated choices separate consistent structural welds from repeated rework.
FAQs
Why does my MIG welder feed wire but produce no arc?
Check ground clamp connection, contact tip condition, and input voltage under load. Corroded buses or loose cable strands inside the machine also block current flow to the gun.
What causes wire to stop feeding in the middle of a weld?
Drive roll tension too loose, clogged liner, or excessive spool brake tension. Clean or replace the liner and re-tension rolls so the wire just stops when pinched.
How do I eliminate porosity when my MIG welder seems to run fine?
Increase gas flow to 30–40 CFH, shorten stickout to ½ inch maximum, and eliminate drafts. Contaminated base metal or wrong gas type (e.g., pure argon on steel) creates the same defect.
What voltage and wire speed should I start with on 1/8-inch steel using .030 wire?
Target 125 A (250 ipm wire speed) then adjust voltage for a crisp buzz—typically 18–20 V with C25 gas. Test and increase voltage 1 V at a time if spatter appears.