There was a point in the shop when a simple weld turned into a constant battle. The arc wouldn’t stay steady, the puddle felt messy, and the finished bead looked nothing like it should.
After burning through a handful of rods and questioning my settings, it became clear what welding rods need to be kept in an oven and how ignoring that step can quietly sabotage a weld.
That lesson came from trial and error on real jobs. Moisture in the wrong electrodes leads to porosity, weak welds, and cracks that show up when it’s too late, wasting time and material.
Once the right rods stayed dry and properly heated, weld quality improved fast. Let me walk you through which rods actually need oven storage and the practical method that works every day in the shop.
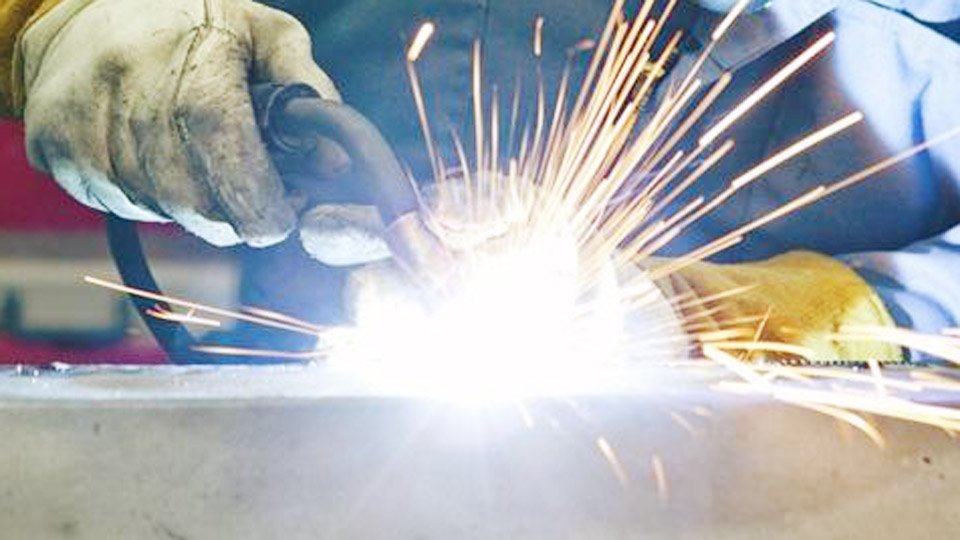
Image thefabricator
Why Proper Rod Storage Actually Matters on the Shop Floor
Moisture in your electrode coating doesn’t just cause tiny pinholes you can grind out. It introduces diffusible hydrogen into the molten weld pool. As the weld cools, that hydrogen gets trapped and creates microscopic cracks—often right at the toe of the weld or under the bead where you can’t see them until it’s too late.
On mild steel under 1/2 inch, you might get away with it on non-critical work. But start welding A572 Grade 50 beams, pressure vessel repairs, or anything over 3/4 inch thick, and the risk jumps.
Hydrogen-induced cracking (sometimes called cold cracking or delayed cracking) can show up hours or even days later. I’ve cut open test plates where the crack ran straight through the heat-affected zone like someone took a saw to it.
Beyond cracking, moist rods give you porosity that shows up as worm tracks or scattered holes, slag that won’t peel cleanly, and an arc that feels unstable. All of that means more grinding, more filler metal, more time, and higher costs. In a commercial shop, those small habits add up fast.
The good news? A dedicated rod oven takes care of most of this with almost no extra effort once you build the routine.
What Makes Low-Hydrogen Rods Different
Low-hydrogen electrodes use a basic flux coating—mostly limestone and other compounds that produce a shielding gas low in hydrogen when done right.
Manufacturers bake them during production to get the moisture content down to around 0.1–0.4%. Once the hermetic can or vacuum pack is opened, that coating starts absorbing ambient humidity.
The “low-hydrogen” label (often marked with an “H” designator like H4, H8, or H16) tells you how much diffusible hydrogen the electrode can produce under controlled conditions. But that only holds if you protect them after opening.
Common low-hydrogen rods you’ll run into in US shops include
- E7018 (the workhorse for structural and general fabrication)
- E7018-1 (better low-temp toughness)
- E8018, E9018, and higher for alloy or higher-strength steels
- E7028 and E7048 for higher deposition rates in flat and horizontal positions
These are all SMAW (stick) electrodes. If you’re running MIG or TIG, this doesn’t apply the same way—your wire and rods have different storage needs.
How Moisture Gets In and What It Does to Your Weld
The flux on a low-hydrogen rod is hygroscopic. Leave a bundle on the bench in a humid shop (most places east of the Mississippi in summer) and it starts pulling water vapor within minutes. After a few hours, the moisture level rises enough to cause problems.
When you strike an arc, that moisture breaks down into hydrogen and oxygen. The hydrogen dissolves into the weld pool and diffuses into the base metal. During cooling, it recombines and creates pressure that forms cracks.
Signs you’ve been welding with compromised rods:
- Porosity at the start of the bead that clears up as the rod burns down
- Slag that sticks or peels in chunks instead of coming off cleanly
- A “gassy” or unstable arc
- Cracks that appear after the weld cools (sometimes overnight)
I’ve had apprentices bring me test coupons with beautiful-looking beads that failed a simple bend test because of this. The fix is simple: keep them hot and dry.
Which Welding Rods Need an Oven (and Which Don’t)
Rods that require oven storage
- All standard E7018, E7016, E7015, E7028, E7048
- Any low-hydrogen classification (EXX15, EXX16, EXX18)
- “R” suffix rods (moisture-resistant) still benefit from ovens and should be stored properly
Rods that should NOT go in a hot oven
- Cellulosic rods like E6010 and E6011 – These need 3–7% moisture in the coating for proper arc force and deep penetration. High heat dries them out, making them run poorly with lots of spatter and shallow penetration.
- Rutile rods like E6013 and E7014 – These tolerate normal shop humidity and perform best stored at room temperature or very mild warmth (under 150°F). Over-drying makes them brittle and hard to strike.
Never mix them. Don’t put 6010s in the same oven as your 7018s. The moisture from the cellulosic rods will migrate to the low-hydrogen ones and ruin them.
Here’s a quick comparison
| Electrode Type | Examples | Storage Temperature | Max Exposure Before Issues | Re-Dry Needed? |
|---|---|---|---|---|
| Low-Hydrogen | E7018, E8018 | 225–300°F (holding oven) | 4 hours (standard), 9 hours (“R”) | Yes, if exceeded |
| Cellulosic | E6010, E6011 | Ambient (room temp) | Not critical | No (avoid heat) |
| Rutile / Others | E6013, E7014 | 100–150°F max | Longer tolerance | Mild dry if very damp |
Setting Up a Rod Oven That Actually Works in Your Shop
You don’t need a fancy industrial unit to start, but it has to hold steady temperature. Portable quivers (heated rod holders) are great for field work—plug them into 120V and they keep a handful of rods at 250°F or so.
For the main shop, look for a benchtop or floor model with good insulation and accurate controls. I like ones with separate holding and baking sections when possible. Capacity matters—get one big enough for a full day’s issue plus extras.
Key features I’ve learned to appreciate
- Adjustable thermostat you can lock
- Good door seal (no cold spots)
- Shelves that let air circulate
- Pilot light or digital display so you know it’s working
Mount it near your welding stations but away from grinders and dust. Keep it plugged in 24/7—turning it on and off wastes energy and creates temperature swings.
Daily Shop Procedures That Keep Rods Fresh
The routine is straightforward once you make it habit:
- Opening a new can — Do it in a dry area. Immediately move what you won’t use that day into the holding oven at 250–300°F.
- Issuing rods — Only give welders what they’ll burn in the next 2–4 hours. Use rod pouches or quivers for field guys.
- Tracking exposure — In code work, log issue time. For general fab, a simple “out by lunch, back in oven” rule works well.
- End of shift — Any unused rods go straight back into the oven. Don’t leave them in the stinger or on the table.
I tell new hires: “Treat the oven like your coffee pot—keep it running and check it every morning.”
Step-by-Step: Re-Drying Rods That Have Been Out Too Long
If rods sat out longer than recommended or feel damp:
- Spread them in a single layer so every rod reaches temperature.
- Start at a lower preheat (around 200°F) for 30–60 minutes to drive off surface moisture gently.
- Ramp up to final baking temperature:
- For standard E7018 (AWS A5.1): 500–800°F for 1–2 hours.
- For higher-strength alloys (A5.5): Closer to 700–800°F for 1 hour.
- Let them cool slowly in the oven or move directly to holding temperature.
Never exceed the recommended times or temperatures—over-baking makes coatings brittle and can degrade alloy elements in higher-strength rods. Most manufacturers say re-bake only once or twice max before discarding.
Important: If rods got actually wet (rain, spilled water), many codes require you to discard them or follow strict reconditioning that’s often not worth the risk on critical work.
Portable Solutions for Field and Mobile Welding
Out on a jobsite, a good quiver is essential. These small heated containers plug into your welder’s 120V outlet or a generator and keep 10–20 pounds of rod at proper temperature. I always issue fresh rods in the morning and rotate them midday.
In cold weather, the challenge flips—ambient air is dry, but condensation can form when rods move from warm shop to cold steel. Preheat the base metal and keep rods protected until the moment you need them.
Matching Rod Diameter, Amperage, and Joint Prep
Storage is only half the battle. Even perfect rods fail if your settings are off.
For E7018, typical amperage ranges on DC+ (reverse polarity):
| Rod Diameter | Flat/Horizontal | Vertical/Overhead | Typical Use Case |
|---|---|---|---|
| 3/32″ | 70–110A | 65–95A | Thin material, root passes |
| 1/8″ | 90–150A | 85–130A | General fabrication |
| 5/32″ | 120–200A | 110–180A | Thicker plate, fillets |
| 3/16″ | 150–250A | 140–220A | Heavy structural |
Start in the middle of the range and adjust by watching the puddle. Too cold and the rod sticks or the bead is convex and ropey. Too hot and you get undercut, excessive spatter, or burn-through.
Always clean the joint thoroughly—no rust, mill scale, oil, or paint. A 60–70° included angle on butt joints and a small root face give you room for good penetration without excessive heat input. Tack welds should use the same rod and be cleaned before the main pass.
Lessons Learned the Hard Way in Real Shops
One summer on a bridge repair in the Midwest, the crew was running E7018 on 1-inch plate. Someone left a full can open overnight in the humid air. The next morning the rods ran “okay” but we started seeing random porosity and a couple of cracks in the x-rays.
We ended up cutting out and rewelding about 40 feet of joint. Cost us time and material, and the inspector wasn’t happy.
Another time, a young welder stored his unused 7018 in a cardboard box next to the oven instead of inside it. By afternoon the beads were gassy. Simple mistake, easy fix once we showed him the routine.
The pros I respect most treat rod storage like part of their machine setup—they check the oven temperature first thing every morning, just like they check their welder settings.
Common Mistakes and How to Fix Them Quickly
- Leaving rods in the stinger overnight — The heat from residual current can damage coatings. Always remove and store them.
- Using the same oven for 6010 and 7018 — Separate them or you’ll contaminate the low-hydrogen rods.
- Guessing exposure time — Get in the habit of issuing small batches and returning them promptly.
- Running low amperage with larger rods — Causes sticking and poor fusion, which compounds any minor moisture issues.
- Ignoring “R” rods — They buy you more time but still need proper storage for best results.
If you notice porosity or cracking, stop, check your rods first, then your joint prep and settings. Nine times out of ten, it’s the rods.
Taking Your Welding to the Next Level
Once you nail rod storage, your welds become more consistent. You spend less time chasing defects and more time building quality work. Whether you’re a hobbyist restoring old equipment, a student learning the trade, or a journeyman on big jobs, this is one of those foundational skills that separates reliable welders from the rest.
The next time you’re about to open a fresh can of 7018, take an extra minute to get the oven ready. Your future self—and anyone inspecting or depending on your welds—will thank you.
One pro-level tip to close it out: Always keep a small “issue oven” or quiver at temperature and only pull out what you’ll use in the next hour or two. It forces good habits and keeps every rod as fresh as the day the can was opened. Small discipline, big difference in the finished weld.
FAQ
How long can E7018 rods stay out of the oven before I need to worry?
For standard E7018, the common limit is about 4 hours in normal shop conditions. Moisture-resistant “R” rods can often go up to 9 hours. After that, re-dry them properly or set them aside for non-critical work. In humid environments, shorten the window.
Can I use a kitchen oven or homemade setup to store or dry welding rods?
I don’t recommend it. Household ovens aren’t designed for the temperatures needed (especially re-baking at 500–800°F) and create fire hazards. Dedicated rod ovens are built for this with proper controls and safety features. A light bulb in a fridge is a classic hack for very mild warmth but won’t cut it for true low-hydrogen storage.
Do I need to re-bake rods every time I put them back in the oven?
No. Holding temperature (225–300°F) is for ongoing storage. Only re-bake if they’ve been exposed too long or show signs of moisture. Most rods can only be re-baked a limited number of times before the coating degrades.
Should I store 6010 or 6011 rods in the oven too?
Absolutely not. These cellulosic rods need their built-in moisture to perform correctly. High heat will dry them out and ruin their digging action and penetration. Keep them in a dry box at room temperature.
How do I know if my low-hydrogen rods have picked up too much moisture?
Look for a “gassy” arc, porosity at the start of the bead, difficult slag removal, or welds that crack after cooling. If in doubt, re-dry them. When rods have been properly stored, the arc is stable, the bead has nice wash-in, and slag peels easily.
Getting rod storage right is one of the simplest ways to level up your welding. It costs little in time or money but pays off every single time you strike an arc. Stay consistent, and your welds will show it.