Automotive sheet metal is thin, heat-sensitive, and highly prone to distortion, which makes precision critical. Understanding How to Weld Automotive Sheet Metal is essential for achieving proper penetration without burn-through, excessive warping, or weak joints that fail under vibration.
Unlike thicker structural steel, body panels demand controlled amperage, short arc length, and disciplined heat management to maintain panel alignment and surface integrity.
Poor technique can lead to oil-canning, excessive filler use, costly rework, and visible defects after painting. In collision repair and restoration work, weld quality directly affects fitment, corrosion resistance, and long-term durability.
I’ll discuss the core welding principles required for thin automotive panels, including process selection, machine settings, heat control methods, and joint preparation. By understanding these fundamentals, you’ll be able to produce cleaner welds, reduce distortion, and meet practical requirements.
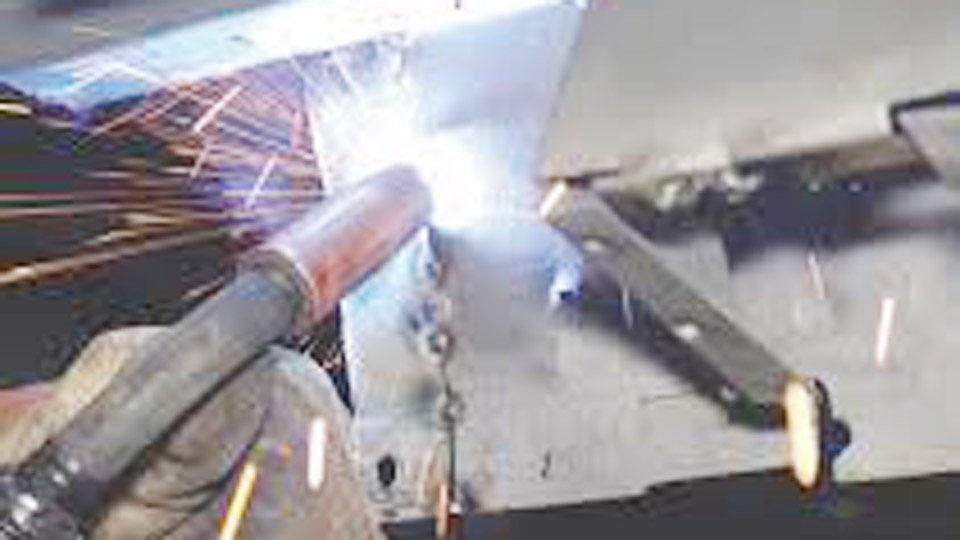
Image musclecardiy
Properties of Automotive Sheet Metal
Automotive sheet metal primarily consists of mild steel, though aluminum is common in modern vehicles for weight reduction. Mild steel offers good strength and weldability, while aluminum requires specific processes due to its lower melting point and higher thermal conductivity.
Sheet metal thickness is measured in gauges: lower numbers indicate thicker material. For example, 18-gauge steel is about 0.048 inches thick, suitable for structural panels, while 22-gauge (0.030 inches) is used for outer body skins. These thin sections heat up quickly during welding, leading to distortion if not managed.
Key properties include tensile strength, which affects joint durability, and ductility, which allows forming without cracking. Surface coatings like galvanization protect against corrosion but can produce fumes during welding, requiring ventilation.
Understanding these traits helps select the right process. For instance, steel’s magnetic properties aid clamping, unlike aluminum.
Selecting the Appropriate Welding Method
The main methods for welding automotive sheet metal are MIG (Metal Inert Gas) and TIG (Tungsten Inert Gas). Each suits different scenarios based on material, thickness, and desired finish.
MIG welding uses a continuous wire feed as both electrode and filler, shielded by gas. It’s faster for larger areas and easier for beginners, making it ideal for steel body panels. However, it generates more heat, increasing distortion risk on thin sheets.
TIG welding involves a non-consumable tungsten electrode with separate filler rod, offering precise heat control. It’s preferred for aluminum or high-quality steel welds where appearance matters, like visible seams. The process is slower but produces cleaner beads with less spatter.
Other options include spot welding for factory-style joins or laser welding for minimal heat input, though the latter requires specialized equipment.
| Method | Pros | Cons | Best For | Typical Thickness |
|---|---|---|---|---|
| MIG | Fast, versatile, good penetration | Higher heat, potential spatter | Steel panels, quick repairs | 18-22 gauge |
| TIG | Precise, clean welds, low distortion | Slower, requires more skill | Aluminum, cosmetic work | 18-24 gauge |
| Spot | Quick, strong for overlaps | Limited to accessible spots | Assembly lines, overlaps | Up to 20 gauge |
Choose MIG for most steel repairs and TIG for precision tasks.
Required Equipment and Supplies
A reliable welder is essential. For MIG, select a unit like a 110-volt model with at least 90 amps output, capable of handling thin wire. TIG requires a machine with foot pedal control for amperage adjustment.
Wire selection: Use 0.023- to 0.030-inch ER70S-6 wire for MIG on steel; it’s mild steel compatible with good flow. For aluminum, switch to 0.035-inch ER4043 or ER5356.
Shielding gas: Argon/CO2 mix (75/25) at 15-20 cubic feet per hour (cfh) for MIG prevents oxidation and ensures smooth arcs. Pure argon at 20 cfh works for TIG.
Additional supplies include a gas lens for TIG torches to improve gas coverage, 1/16-inch ceriated tungsten electrodes sharpened to 30-50 degrees, and filler rods matching the base metal.
Tools: Angle grinder with 36-grit discs for cleanup, clamps (vise-grips or magnetic), scriber for marking, and a hammer/dolly set for alignment. Personal protective equipment includes auto-darkening helmet, gloves, and respirator for fumes.
Backings like copper spoons absorb heat during welding.
Surface Preparation and Fit-Up
Proper preparation ensures strong welds. Start by removing damaged sections using shears or a cutoff wheel, leaving clean edges.
Clean the metal: Degrease with acetone or brake cleaner to eliminate oils, then grind off rust or paint within 1 inch of the joint. For galvanized steel, remove the coating to avoid toxic fumes.
Fit-up is crucial for butt joints, preferred over laps to prevent corrosion traps. Aim for a 1/32-inch gap for filler penetration. Scribe the patch panel outline on the vehicle, trim precisely, and test fit.
Clamp securely: Use butt-weld clamps or magnets to hold panels flush. Check alignment with a straightedge; adjust with light hammering if needed.
For aluminum, use dedicated brushes to avoid contamination. Joint preparation includes beveling edges on thicker sections for better fusion, but flat butts suffice for thin sheets.
This step minimizes gaps that cause blow-through.
Executing the Weld
Begin with tack welds spaced 1 inch apart to secure the patch. For MIG, set voltage to 13-19 volts and wire speed to 3.1-7.1 meters per minute, depending on thickness; higher settings with quick travel reduce heat on thin metal. Maintain 1/2-inch wire stickout.
Weld in short stitches: Create 1-inch beads, overlapping tacks, then cool completely—use compressed air if necessary. Move from top to bottom or skip sections to distribute heat.
For TIG, set amperage to 45-50 amps on DC electrode negative for steel, or AC for aluminum. Use foot control to vary heat. Hold the torch at 15-20 degrees, with 1/8-1/4-inch tungsten stickout. Add filler wire steadily, keeping beads 1-1.5 times material thickness.
Technique: Push the puddle for MIG to avoid undercutting; for TIG, dab filler into the arc. Travel speed influences penetration—faster speeds for thinner metal prevent burn-through.
If accessible, place a copper backing behind the joint to dissipate heat.
One practical insight: Adjusting wire speed finer than voltage often stabilizes the arc on varying thicknesses.
Managing Heat and Distortion
Heat management prevents warping, a common issue with thin automotive sheet metal. Weld in segments no longer than 1 inch, allowing full cooling between passes. This equalizes contraction.
Use backings or chill bars—copper or aluminum strips clamped behind the weld—to absorb excess heat.
Control input: Lower amperage or increase travel speed for sensitive areas. For curved panels, weld continuously if distortion is minimal; for flat ones, skip-weld.
Post-weld, if warping occurs, use a hammer and dolly to stretch high spots and raise lows while the metal is warm but not hot.
Monitor arc characteristics: A stable, hissing arc indicates proper settings; crackling suggests too much heat.
Another insight: Pre-heating aluminum panels slightly can reduce cracking risks due to its expansion properties.
Post-Weld Processing
After welding, grind beads flush using a 36-grit disc at low speed to avoid reheating. Angle the grinder to remove material evenly.
Inspect for pinholes or cracks; reweld if needed. Sand with 50-grit, then 120-grit orbital for smoothness.
Apply self-etching primer immediately to bare metal to prevent rust, especially on steel. For aluminum, use compatible coatings.
If filler is required for low spots, skim a thin layer and sand to contour.
Final inspection: Check seam strength by flexing gently; ensure no visible defects.
This finishes the repair, ready for paint.
Final Thoughts
So, How to weld automotive sheet metal builds on grasping material properties, method selection, and heat control to produce reliable repairs. These fundamentals allow consistent results, whether patching rust or fabricating panels. By prioritizing precise fit-up and short welds, you minimize rework and enhance vehicle longevity.
In high-stress areas like frame attachments, consider pulse MIG modes on capable welders to further reduce heat-affected zones, improving fatigue resistance without compromising penetration.
FAQs
What wire size is best for MIG welding 20-gauge automotive steel?
Opt for 0.023-inch ER70S-6 wire; it provides fine control and reduces burn-through risk compared to thicker options.
Can I weld automotive aluminum sheet metal with MIG?
Yes, but use 0.035-inch ER4043 wire, pure argon gas, and a spool gun to prevent feeding issues. Set voltage lower to account for aluminum’s conductivity.
How do I prevent warping when welding large body panels?
Divide the seam into sections, weld alternately, and use heat sinks. Allow full cooling between beads, and planish welds with a hammer to relieve stress.
What’s the ideal gas flow for TIG welding steel sheet metal?
Set pure argon to 20 cfh; this ensures adequate shielding without turbulence that could introduce contaminants.
Is spot welding suitable for DIY automotive repairs?
It’s effective for overlaps but requires a dedicated spot welder. For home use, MIG or TIG offers more versatility for custom fits.