Frustrated by erratic arcs, excessive spatter, or joints that crack under load on thin sheet metal or heavier stock? These issues often trace directly to incorrect wire loading, wrong polarity, mismatched drive rolls, or unoptimized voltage and wire feed speed on the Lincoln 140 MIG welder.
Learning how to set up a Lincoln 140 MIG welder eliminates guesswork and delivers stable arcs, minimal cleanup, and full penetration across 24-gauge sheet to 3/16-inch plate in a single pass.
This guide focuses on the precise technical decisions that control arc stability, deposition rate, and weld quality for gas-shielded MIG on mild steel, stainless, or flux-cored applications.
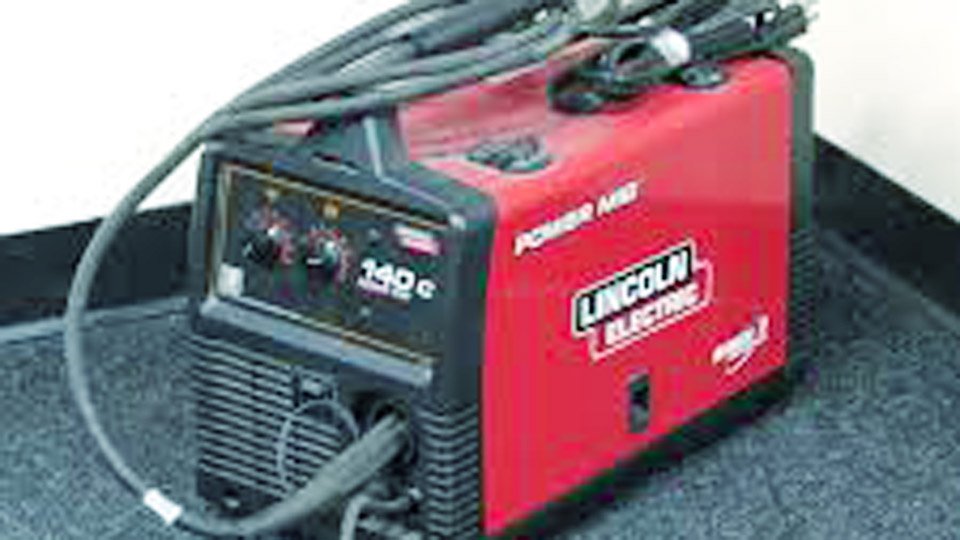
Image by pawnamerica
Preparing Consumables and Workspace for the Lincoln 140 MIG Welder
Wire and Drive Roll Selection
Match wire diameter and type to the drive roll groove exactly. Use .025-inch or .030-inch solid wire (SuperArc L-56 or equivalent) with the smooth .025-.030 groove for gas-shielded MIG. Switch to the knurled .030-.045 groove only for flux-cored wire (.035-inch NR-211-MP typical).
Smooth rolls prevent crushing solid wire and maintain consistent feed pressure; knurled rolls provide the extra grip needed for flux-cored wire’s softer sheath without slipping. Installing the wrong roll causes bird-nesting or erratic feeding that wastes time and wire.
Contact Tip and Nozzle Choices
Install a .025-inch tip for .025-inch wire or .035-inch tip for thicker wire. The tip bore must clear the wire by no more than 0.002–0.003 inches for proper current transfer.
Brass MIG nozzles direct 75/25 Ar/CO₂ flow cleanly; black gasless nozzles suit flux-cored without restricting self-shielding flux. Always trim the wire to ⅜-inch stickout after tip installation to control arc start and prevent burn-back.
Unpacking and Initial Machine Assembly
Gun and Cable Connections
Slide the Magnum 100L gun connector through the front panel bushing and secure with the thumbscrew for solid brass-to-brass contact. Plug the 4-pin trigger lead into the receptacle below. These connections carry both power and trigger signal; loose fit creates resistance that drops voltage at the arc and causes inconsistent starts.
Power Requirements and Circuit Verification
The Lincoln 140 draws 20 amps at rated output on a 120V 60 Hz circuit. Use a dedicated 20-amp time-delay breaker and #12 AWG extension cord (maximum 50 ft) to limit voltage drop below 3%.
Plug in only after all internal connections are complete and the power switch is OFF. A weak circuit collapses voltage under load, shortening arc length and producing cold laps.
Configuring the Wire Drive System
Installing the Drive Roll
Open the side door, release the tension thumbscrew, and pivot the arm upward. Remove the installed roll and insert the correct one with the size stamp facing outward. The dual-track design lets one roll handle two wire sizes when oriented properly. Close the arm and hand-tighten the tension screw just enough to prevent slippage during a feed test.
Loading and Threading the Wire Spool
Place the 4-inch or 8-inch spool on the spindle (use the adapter for 8-inch) so wire unwinds from the top. Secure with the wing nut and adjust the spool brake for light drag—enough to stop overrun but not enough to stall feeding.
Cut 6 inches of wire straight, thread it through the inlet guide, across the drive roll groove, and into the outgoing guide toward the gun liner.
Hold the wire firmly, press the gun trigger, and feed 4–6 inches out the contact tip. Release and trim to ⅜ inch. Incorrect spool orientation or excessive brake tension causes tangles and feed interruptions.
Setting Tension and Brake
Increase tension until the wire feeds without slipping when you pinch it lightly during trigger activation. Over-tension flattens the wire and accelerates liner wear; under-tension allows slippage and erratic arc. The numeric tension indicator on many 140 models helps repeat optimal ranges for each wire diameter.
Setting Polarity for MIG Operation
Electrode Positive (DCEP) for Gas-Shielded MIG
Connect the short power cable from the wire drive to the positive (+) output terminal and the work clamp cable to the negative (–) terminal. DCEP concentrates heat at the workpiece for deeper penetration and cleaner transfer with solid wire. This is the factory default for most MIG setups and produces a stable, spray-like arc with 75/25 Ar/CO₂.
Electrode Negative (DCEN) for Flux-Cored
Swap the cables: gun to negative, work to positive. Flux-cored wire requires DCEN for proper flux activation and deep penetration without external gas. The Lincoln 140 makes this change tool-less inside the wire compartment—simply loosen the terminal nuts and reverse the leads.
Installing the Shielding Gas System
Gas Selection by Application
For mild steel, 75/25 Ar/CO₂ provides excellent arc stability and low spatter on thin material. Use 100% CO₂ (with adapter) for deeper penetration on thicker plate when cost matters more than bead appearance. Stainless steel benefits from tri-mix (90/7.5/2.5 Ar/He/CO₂) for reduced oxidation. Never use 100% argon on steel—it produces unstable arcs and poor fusion.
Regulator and Flow Rate Setup
Secure the cylinder upright and chain it. Crack the valve briefly to purge dirt, then attach the regulator (CGA-580 for argon mixes). Connect the 5/8-18 hose to the machine inlet. Set flow to 30–40 CFH for indoor work; increase to 40–50 CFH in drafts. Trigger the gun with no wire contact to verify steady flow at the nozzle. Close the cylinder valve when finished to prevent leaks.
Understanding and Using the Control Panel
Voltage Control and Arc Characteristics
The voltage knob (often lettered A–J) directly controls arc length and heat input. Lower settings (A–C) produce a short, focused arc ideal for thin material and prevent burn-through.
Higher settings (E–H) lengthen the arc for faster travel on thicker plate. Too much voltage creates undercut and excessive spatter; too little causes stubbing and lack of fusion.
Wire Feed Speed (WFS) and Deposition
The WFS knob (typically numbered 1–10 or scaled 50–500 ipm) determines how quickly wire enters the arc and thus amperage and deposition rate.
Higher WFS increases melt-off and travel speed but demands matching voltage to avoid cold laps. The two controls interact: raise voltage slightly when increasing WFS to maintain arc stability.
Using the Built-in Reference Chart
The procedure decal inside the wire compartment door lists starting points by material thickness, wire diameter, and process. Always begin there, then fine-tune by sound and puddle behavior. A steady “frying bacon” or buzzing arc indicates correct settings.
Recommended Starting Settings for Mild Steel MIG Welding
| Material Thickness | Wire Size | Voltage Setting | Wire Speed Setting | Approx. Amps | Typical Travel Speed |
|---|---|---|---|---|---|
| 24 gauge | .025″ | A | 2–3 | 30–50 | Fast |
| 18–20 gauge | .025″ | B | 4 | 60–80 | Medium |
| 16 gauge | .030″ | C–D | 5 | 70–90 | Medium |
| 1/8 inch | .030″ | E | 7–8 | 110–130 | Medium-slow |
| 3/16 inch | .035″ | F–G | 9 | 130–140 | Slow (multiple passes if needed) |
These values assume .025–.030-inch solid wire and 75/25 Ar/CO₂ at 30–40 CFH. Test on scrap of the same thickness and joint type. Vertical or overhead positions usually require 1–2 volts lower and slightly reduced WFS for puddle control.
Fine-Tuning for Stainless Steel and Joint Configurations
Stainless requires the same polarity and smooth drive rolls but often 1–2 volts higher than mild steel to compensate for higher thermal conductivity.
Use tri-mix gas and keep travel speed higher to minimize heat input and distortion. For lap or fillet joints, increase WFS slightly for faster deposition; butt joints on thin material favor lower voltage to avoid melt-through.
Setup Variations for Flux-Cored and Aluminum
Flux-Cored Welding Without Gas
Use DCEN polarity, knurled drive roll, gasless nozzle, and .035-inch flux-cored wire. Settings mirror the MIG chart but tolerate slightly higher voltage for deeper penetration. Ideal for outdoor or dirty material where gas shielding is impractical.
Aluminum Welding with Optional Spool Gun
The standard gun liner and drive system fight soft aluminum wire. Install the Magnum 100SG spool gun, set the selector switch to spool-gun mode, load .030-inch or .035-inch 4043 or 5356 wire, and use 100% argon at 30–40 CFH. Voltage settings run 1–2 letters higher than steel; WFS stays moderate to prevent burn-through on thin sections.
Verifying Setup Through Test Welds and Initial Adjustments
Trigger the gun on scrap to confirm smooth wire feed with no binding or stuttering. Strike an arc and listen: a crisp, consistent crackle means balanced parameters. Adjust voltage first for arc length, then WFS for puddle size. Note travel speed—too slow overheats thin material; too fast causes lack of fusion. Clean test coupons with a dedicated stainless brush to eliminate variables.
Maintaining Setup Integrity for Long-Term Performance
After welding, release trigger tension, close the gas valve, and wipe the drive rolls and liner. Inspect the contact tip for wear or spatter buildup every 1–2 hours of arc time and replace at first sign of resistance.
Check polarity cables and gun connections monthly for tightness. Store wire spools in a dry location to prevent rust that flakes inside the liner and causes feed jams.
Performance-Based Takeaway
Once polarity, drive roll, gas flow, and voltage/WFS are locked to the reference chart and verified on scrap, the Lincoln 140 MIG welder consistently produces professional-quality beads with minimal spatter and full penetration on home and small-shop projects.
The real expertise lies in recognizing that voltage sets arc length while wire feed speed sets heat input and travel speed—their precise balance lets you push the machine’s 20% duty cycle effectively on thicker material by welding in controlled short bursts and monitoring interpass temperature. Master this interaction and the 140 becomes a precision tool rather than a trial-and-error box.
Frequently Asked Questions
What shielding gas works best with the Lincoln 140 MIG welder for mild steel?
75/25 Ar/CO₂ at 30–40 CFH delivers the cleanest arc and lowest spatter. Use 100% CO₂ with the proper adapter only when deeper penetration outweighs bead appearance.
How do I switch polarity on the Lincoln 140 for flux-cored welding?
Open the side door, loosen the output terminal nuts, and reverse the short power cable and work cable leads—gun to negative, work to positive. No tools beyond a wrench are required.
Can the Lincoln 140 MIG welder weld aluminum, and what setup is required?
Yes, but only with the optional Magnum 100SG spool gun, 100% argon, and .030–.035-inch aluminum wire. Standard gun and liner cause feeding problems.
Why won’t my wire feed properly after setup?
Common causes are incorrect drive roll groove, excessive or insufficient tension, dirty or kinked liner, or spool brake set too tight. Re-thread the wire and test feed with the gun disconnected from the workpiece.