Many people who work with plumbing face a frustrating challenge: soldering a copper pipe that still has water inside. Water in the pipe makes soldering difficult, as it cools the pipe and stops the solder from melting and sealing properly.
Sometimes you cannot fully drain the pipe because water keeps coming from somewhere, or the building cannot be shut down. Even experienced plumbers struggle with this problem.
But it is possible to do a strong, leak-free solder joint on a copper pipe with water in it if you know the right methods.
In this article, you will learn everything you need to succeed. We will cover why water makes soldering hard, what tools and materials you need, step-by-step solutions for different situations, common mistakes, safety tips, and pro-level tricks that save time.
Even if you are a beginner, you will find practical advice that goes beyond the basics. By the end, you will know how to solder a copper pipe with water in it confidently and safely.
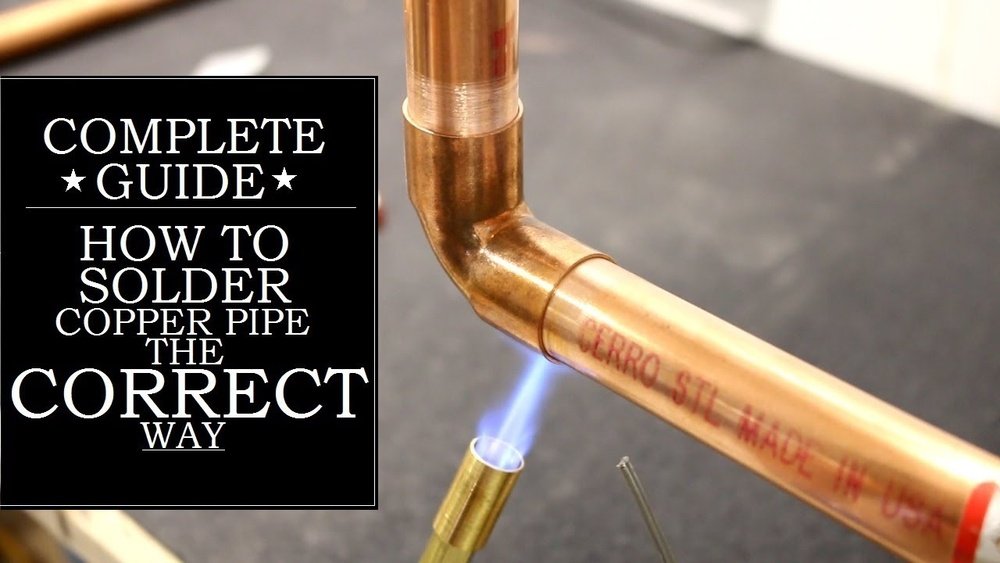
Image by YT@Got2Learn
Why Water Causes Problems In Soldering Copper Pipes
When you try to solder a copper pipe, the joint must reach a high temperature—usually around 400°C (750°F)—so the solder melts and flows into the gap. If there is water inside, it absorbs heat and keeps the pipe cool.
Even a few drops can prevent the joint from reaching the needed temperature. The result is poor solder flow, weak joints, leaks, and wasted time.
There are a few reasons why water remains in pipes:
- Gravity keeps water trapped in horizontal pipes.
- Drips from nearby fixtures or valves.
- Building systems cannot be shut down.
- Condensation from humid air.
A pipe with water is not just annoying—it is a real barrier to a solid, lasting joint. Even tiny amounts can ruin the job. This is why plumbers often spend more time removing water than doing the actual soldering.
Tools And Materials You Need
To solve this problem, you need special tools and materials. The right equipment makes the job easier, safer, and more reliable.
- Propane or MAPP gas torch: Hotter than butane, needed for wet pipes.
- Pipe cleaning brush: Removes dirt and corrosion.
- Emery cloth or sandpaper: For cleaning pipe surfaces.
- Flux: Helps solder flow and stick to metal.
- Lead-free solder: Safe for drinking water pipes.
- Pipe cutter: For clean, straight cuts.
- Bucket and towels: For catching and drying water.
- Wet/dry vacuum: Removes stubborn water.
- Pipe freezing kit: Stops water flow temporarily.
- Compressed air canister: Blows out remaining water.
- Pipe plugging tools (like bread or foam): Blocks water for short periods.
- Heat shield or flame protector: Protects walls and nearby surfaces.
- Fire extinguisher: Always have one nearby.
- Safety glasses and gloves: For personal protection.
Some of these tools are optional, but others are essential. For example, a pipe plugging tool (like a wad of bread) can block water for a short time, letting you solder quickly before it dissolves. A pipe freezing kit works well for larger jobs where you cannot shut off water.
How To Prepare The Pipe Before Soldering
Preparation is more important than soldering itself. If you skip these steps, you will waste time and risk leaks.
Clean And Dry The Joint
First, clean the pipe and fitting with a pipe cleaning brush and emery cloth. Remove all dirt, corrosion, and old solder. The surface must be shiny and smooth. Next, dry the area as much as possible. Use towels, a vacuum, or compressed air to remove water. If water keeps coming, try plugging the pipe.
Plug The Pipe
One common trick is to plug the pipe with white bread. Tear off a small piece, roll it into a ball, and push it into the pipe. The bread absorbs water and blocks flow for a short time. After soldering, it dissolves and washes away. Do not use colored or seeded bread, as it can leave debris.
Other options include foam plugs or pipe freezing kits. These are more expensive but work better for larger pipes or longer jobs.
Set Up A Heat Shield
Before using the torch, protect nearby walls and surfaces. Place a heat shield or flame protector behind the joint. This prevents fire and damage.
Step-by-step Guide To Soldering A Copper Pipe With Water In It
Now, let’s look at the exact steps to solder a wet copper pipe successfully. The process is similar to normal soldering, but with extra care.
- Shut off water supply: If possible, turn off the main valve. Drain water from the system.
- Open faucets: Open nearby faucets to release water and pressure.
- Remove as much water as possible: Use towels, vacuum, or compressed air.
- Plug the pipe: Use bread, foam, or pipe freezing kits as needed.
- Clean the pipe and fitting: Use brush and emery cloth until shiny.
- Apply flux: Coat both pipe and fitting with flux. Use enough, but not too much.
- Fit pipe and joint together: Push them in firmly.
- Set up heat shield: Protect walls and surfaces.
- Heat the joint: Use a propane or MAPP torch. Focus on the fitting, not the pipe.
- Add solder: Touch solder to the joint. It should melt and flow around the pipe.
- Remove heat: Let joint cool naturally.
- Check for leaks: After cooling, turn water back on and inspect.
If water comes back into the pipe during soldering, stop and repeat the plugging and drying steps.
Dealing With Persistent Water Problems
Sometimes, water keeps coming no matter what you do. This is common in large buildings, old systems, or pipes with complex connections. In these cases, normal plugging tricks may not work.
Pipe Freezing Kits
A pipe freezing kit uses chemicals or electrical devices to freeze water inside the pipe. This creates a solid block of ice that stops water flow. You can solder the joint, then thaw the pipe afterward. These kits are expensive but work well for urgent jobs.
Vacuum And Air Tricks
If you cannot freeze the pipe, try using a wet/dry vacuum or compressed air. Insert the vacuum hose into the pipe and turn it on. This removes water quickly. Compressed air can blow out water, but be careful—high pressure can damage pipes.
Using Special Solder And Flux
There are special high-temperature fluxes and silver solder that work better in wet conditions. These products are more expensive and harder to use, but they can help when normal solder fails.
Common Mistakes And How To Avoid Them
Many beginners make mistakes that cause leaks, weak joints, or wasted time. Avoid these errors for best results.
- Not cleaning the pipe enough: Dirty or corroded pipes prevent solder from sticking. Clean until shiny.
- Using too much flux: Excess flux causes messy joints and can block pipes.
- Not plugging the pipe: Always block water with bread, foam, or freezing.
- Overheating the pipe: Too much heat burns flux and damages pipes.
- Underheating: If the joint is not hot enough, solder will not flow.
- Moving the joint while hot: Let it cool before touching.
- Using wrong solder: Use lead-free solder for drinking water pipes.
- Skipping leak check: Always check for leaks after soldering.

Credit: www.youtube.com
Safety Tips For Soldering With Water In Pipes
Soldering is risky. Water adds extra dangers. Follow these safety rules:
- Wear safety glasses and gloves.
- Keep a fire extinguisher nearby.
- Never solder near flammable materials.
- Use a heat shield.
- Ventilate the area.
- Do not use excessive force with compressed air.
- Check pipe for pressure before soldering.
Advanced Solutions For Tough Situations
Some jobs are more difficult than others. For example, soldering in tight spaces, vertical pipes, or pipes with heavy water flow. Here are advanced tricks:
Soldering In Tight Spaces
If space is limited, use a mini torch or a flexible torch head. These tools fit into small areas and reduce risk of fire.
Vertical Pipes
Water in vertical pipes is hard to block. Try freezing kits, or use extra bread plugs. Work fast, as water will dissolve the plug quickly.
Heavy Water Flow
If water cannot be stopped, consider push-fit connectors or compression fittings. These do not require heat or solder. They are more expensive, but work well in emergencies.
Comparing Different Methods To Remove Water
There are several methods to remove water from pipes. Each has strengths and weaknesses. Here is a comparison:
| Method | Effectiveness | Cost | Speed | Best Use |
|---|---|---|---|---|
| Bread Plug | Moderate | Low | Fast | Small jobs |
| Wet/Dry Vacuum | Good | Medium | Medium | Any job |
| Pipe Freezing Kit | Excellent | High | Slow | Large pipes |
| Compressed Air | Good | Low | Fast | Short pipes |
Types Of Solder And Flux For Wet Pipes
Not all solder and flux work well with water. Here is a comparison of popular types:
| Solder Type | Melting Point | Water Resistance | Recommended Use |
|---|---|---|---|
| Lead-Free Solder | 217°C (423°F) | Low | Normal jobs |
| Silver Solder | 230°C (446°F) | Medium | Wet joints |
| High-Temp Flux | N/A | High | Wet or dirty pipes |

Credit: www.familyhandyman.com
How Professional Plumbers Handle Difficult Situations
Experienced plumbers have tricks that beginners rarely use. Here are some non-obvious insights:
- Use two torches: Heat both sides of the joint at once to reach the needed temperature faster.
- Pre-heat the fitting: Warm the fitting before soldering, then remove water and solder quickly.
- Use pipe freezing spray: Spray directly onto the pipe to freeze water instantly.
- Angle the pipe: If possible, tilt the pipe so water moves away from the joint.
- Choose push-fit connectors for extreme cases.
Many professionals keep these tools ready for emergencies. They know that speed is important, as plugs like bread dissolve fast.
Real-life Examples And Statistics
According to a survey by the American Society of Plumbing Engineers, nearly 60% of emergency pipe repairs involve water in the pipe.
Plumbers report that bread plugs work in 80% of simple jobs, but freezing kits are needed for large systems. Most leaks happen because the joint did not reach the right temperature.
For example, a plumber in New York used a bread plug and a mini torch to solder a pipe in an apartment building without shutting down the main water.
The job took 10 minutes and worked perfectly. In another case, a hospital used a pipe freezing kit to stop water in a 2-inch pipe, allowing repairs without turning off the whole system.
Credit: ctubwv.com
Comparing Push-fit And Soldered Joints
Sometimes, push-fit connectors are a better choice. Here is a comparison:
| Type | Strength | Cost | Installation Time | Water Resistance |
|---|---|---|---|---|
| Soldered Joint | High | Low | Medium | Good |
| Push-Fit Connector | Medium | High | Fast | Excellent |
Push-fit connectors are quick and ideal for urgent jobs. Soldered joints are stronger and cheaper in the long run.
Practical Tips For Beginners
If you are new to soldering, remember these tips:
- Practice on dry pipes first.
- Clean and dry the joint carefully.
- Keep all tools ready before starting.
- Use bread plugs only for small pipes.
- Work quickly—water plugs dissolve fast.
- Always check for leaks after finishing.
- Ask for help if unsure.
Environmental And Health Considerations
Lead-based solder is banned in drinking water pipes in many countries. Always use lead-free solder. Dispose of bread plugs and other materials safely. Open windows to avoid breathing fumes. Protect children and pets from tools and chemicals.
When To Call A Professional
Some jobs are too difficult or risky for DIY. Call a plumber if:
- The pipe is very large or complex.
- You cannot stop water flow.
- There are many joints to solder.
- The pipe is near electrical wires.
- You feel unsafe.
A professional has the right tools and experience. They can fix leaks faster and safer.
Frequently Asked Questions
What Can I Use To Block Water In A Copper Pipe For Soldering?
You can use white bread, foam plugs, or a pipe freezing kit. Bread plugs are cheap and work well for small pipes. Foam plugs are reusable. Freezing kits are best for large jobs.
Is It Safe To Solder A Pipe With Water Inside?
It is safe if you follow basic safety rules. Wear safety glasses, use a heat shield, and keep a fire extinguisher nearby. Never solder near flammable materials.
Why Won’t My Solder Melt When The Pipe Has Water In It?
Water absorbs heat and keeps the pipe cool. The pipe cannot reach the temperature needed for solder to melt. Remove as much water as possible and plug the pipe before soldering.
Can I Use Push-fit Connectors Instead Of Soldering?
Yes, push-fit connectors work well in wet conditions and do not require heat. They are more expensive but good for urgent repairs. Soldered joints are stronger and cheaper for long-term use.
Final Thoughts
Soldering a copper pipe with water inside is a real challenge, but not impossible. With the right tools, careful preparation, and smart tricks, you can create strong, leak-free joints even in tough conditions. Always clean and dry the joint, use plugging tools, and check for leaks.
If you face persistent water problems, try advanced methods or call a professional. Stay safe, follow health rules, and practice to improve your skills. With confidence and knowledge, you can handle most plumbing repairs yourself and save time and money.