
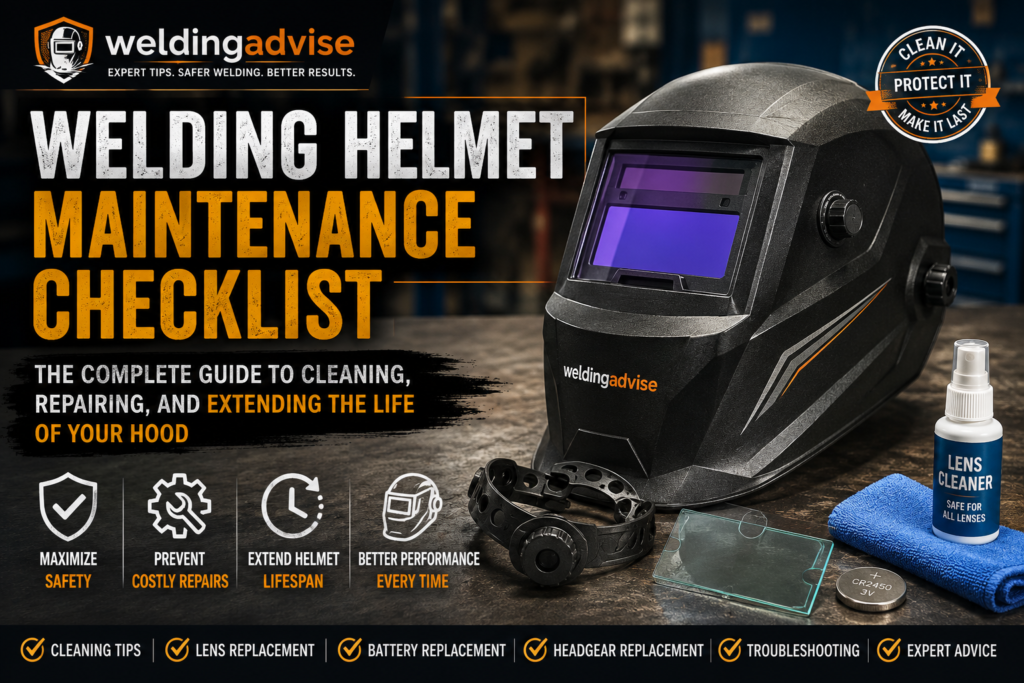
A neglected welding helmet is one bad sensor away from an arc flash burn. Dirty lenses cause squinting and bad bead placement. Weak batteries cause late triggering, which is how welders end up with sunburned eyeballs from a fraction-of-a-second flash. A welding helmet maintenance checklist isn’t busywork, it’s the difference between a hood that protects you for a decade and one that quietly fails you mid-arc.
This guide covers everything a welder needs to keep a helmet in top shape: daily, weekly, monthly, and annual inspection routines; cleaning methods that won’t scratch your optics or damage your ADF cartridge; step-by-step battery and lens replacement; how to fix a loose-fitting helmet; how long helmets actually last; and the warning signs that mean it’s time to retire the hood entirely. Whether you’re running a Lincoln Viking on a production floor, a Miller Digital Elite in a fab shop, or a budget Harbor Freight hood in your home garage, the same principles apply.
Table of Contents
- Why Welding Helmet Maintenance Matters
- Complete Welding Helmet Maintenance Checklist
- Maintenance Schedule (Daily, Weekly, Monthly, 6-Month, Annual)
- Cleaning a Welding Helmet Properly
- Welding Helmet Battery Replacement
- How to Replace a Welding Helmet Lens
- How Often Should You Replace the Lens?
- Replacing Headgear on a Welding Helmet
- Fixing a Loose Welding Helmet
- How Long Do Welding Helmets Last?
- When to Replace a Welding Helmet
- Storage Tips
- Common Maintenance Mistakes
- Professional Maintenance Tips
- Frequently Asked Questions
Why Welding Helmet Maintenance Matters
Your welding helmet is a piece of welding PPE, but it’s also an optical instrument and an electronic device rolled into one. Every part of it can fail in a way that affects your eyes.
Safety and Eye Protection
Welding arcs throw off intense ultraviolet and infrared radiation, along with visible light bright enough to burn your retina in seconds of unprotected exposure. A helmet that meets ANSI Z87.1 is built to block UV/IR radiation continuously, even in the ADF’s “light” state, before it darkens. That protection depends on the lens staying intact, uncracked, and properly seated. A pitted or cracked cover lens, a delaminating ADF, or a shell with a hairline fracture can all let radiation or debris reach your face.
Arc Sensors Keep You From Getting Flashed
Auto-darkening helmets rely on arc sensors, usually two to four small photodiodes on the front of the ADF cartridge, to detect the arc and trigger the lens to darken in a fraction of a millisecond. Spatter, grinding dust, or grease covering even one sensor can slow or prevent that trigger. A late-triggering lens is one of the most common causes of “arc eye” (photokeratitis), a painful UV burn to the cornea that side-lines welders for days.
Optical Clarity and Productivity
A scratched or hazy lens doesn’t just look bad, it forces you to weld closer to the joint, distorts your view of the puddle, and causes eye fatigue over a full shift. Welders with dirty or degraded optics tend to produce worse beads because they can’t clearly see the leading edge of the puddle. Keeping the cover lenses clean is a productivity issue as much as a safety one.
Comfort Over a Full Shift
Sweatbands soaked in salt and oil, ratchets that won’t hold adjustment, and headgear padding that’s gone flat all contribute to neck strain, pressure headaches, and welders constantly repositioning the helmet instead of focusing on the weld. Comfort problems are maintenance problems just as much as safety problems are.
Complete Welding Helmet Maintenance Checklist
Walk through every part of the helmet in order, front to back. This is the same sequence a shop safety officer would use during a PPE audit.
✓ Shell
Check the outer shell for cracks, deep gouges, heat discoloration, or brittleness. Polycarbonate and nylon shells degrade under UV exposure over years of use, becoming more brittle even without visible damage. Flex the shell gently at the edges, if you hear cracking sounds or see stress-whitening, the shell has lost integrity and needs replacing.
✓ Lens (Cover Plates)
Inspect both the front (outside) and rear (inside) cover lenses for pitting, spatter pockmarks, scratches, and cracks. These are the cheapest and most frequently replaced parts on the helmet, they’re sacrificial by design, meant to take the abuse so your ADF cartridge doesn’t have to.
✓ Auto-Darkening Filter (ADF)
Look at the ADF cartridge itself for delamination (a cloudy or bubbled appearance between layers), dead pixels or dark spots, uneven shading across the lens, or a shell crack around the cartridge housing. Test the shade transition by exposing it to a bright light, it should darken instantly and return to its light state cleanly with no flicker or lag.
✓ Sensors
The arc sensors sit on the front face of the ADF, usually as small round or rectangular windows. Check for spatter buildup, dust, or grinding residue. A sensor that’s even partially obstructed causes delayed or inconsistent triggering.
✓ Solar Panel
On solar-assisted helmets, check the small solar cell strip (usually above or beside the sensors) for grime or scratches. The solar panel doesn’t eliminate the need for batteries, but a dirty or damaged panel forces the battery to do more work, shortening its life.
✓ Battery
Check the battery compartment for corrosion, a weak or flickering low-battery indicator light, or slow lens response. Confirm the battery contacts are clean and make firm contact, loose contacts are a common cause of intermittent ADF failure that gets misdiagnosed as a bad cartridge.
✓ Headgear
Inspect the headband, crown strap, and pivot points where the headgear attaches to the shell. Look for cracked plastic, stripped ratchet teeth, and stretched or torn straps.
✓ Sweatband
Check for saturation, odor, fraying, or hardened salt deposits. A sweatband that’s lost its absorbency will let sweat run into your eyes and will hold bacteria against your skin.
✓ Ratchet
Turn the ratchet knob through its full range. It should hold tension smoothly without slipping, clicking erratically, or feeling gritty. A ratchet that slowly loosens during a shift is one of the most common complaints welders have and is almost always a wear or contamination issue, not a design flaw.
✓ Adjustment Knobs
Check the shade, sensitivity, and delay adjustment knobs or buttons for a positive, responsive feel. Sticky or unresponsive controls are usually caused by weld dust packed into the housing.
✓ Neck Area / Cape
If your helmet has a neck curtain or leather cape, inspect it for burn-through holes, especially if you do a lot of overhead or out-of-position welding. Neck flash burns are common and largely preventable with an intact neck cover.
✓ Side Windows (If Applicable)
Helmets with peripheral side windows should have those secondary lenses checked the same way as the main lens, clarity, cracks, and secure seating in the frame.
Welding Helmet Maintenance Schedule
Daily Checklist
| Item | What to Check | Action if Failed |
|---|---|---|
| ADF lens | Wipe clean, check for scratches | Clean or flag for replacement |
| Cover lens | Spatter, pitting, cracks | Replace before next shift |
| Arc sensors | Visible dust or spatter | Clean with dry cotton swab |
| Auto-darkening trigger | Test against bright light | Investigate battery/sensor if slow |
| Headgear fit | Comfortable, secure, level | Re-adjust ratchet |
| Shell | Visual check for cracks | Remove from service if cracked |
Weekly Checklist
| Item | What to Check | Action if Failed |
|---|---|---|
| Sweatband | Odor, saturation, wear | Hand wash or replace |
| Ratchet mechanism | Smooth hold, no slipping | Clean debris from ratchet teeth |
| Battery indicator | Full brightness, no flicker | Replace battery if dim |
| Solar panel (if equipped) | Clean, unscratched surface | Wipe with microfiber cloth |
| Interior padding | Compression, tearing | Replace pads |
Monthly Checklist
| Item | What to Check | Action if Failed |
|---|---|---|
| ADF cartridge | Delamination, dead spots, uneven shading | Replace ADF cartridge |
| Headgear straps | Stretch, fraying, cracked plastic | Replace headgear kit |
| Neck cape | Burn holes, thinning material | Replace cape |
| Adjustment knobs | Responsive shade/sensitivity/delay controls | Blow out with compressed air, low PSI |
| Battery contacts | Corrosion or discoloration | Clean contacts with a dry cloth or eraser |
Every 6 Months
| Item | What to Check | Action if Failed |
|---|---|---|
| Battery replacement | Age and performance under heavy use | Replace proactively, even if working |
| Full ratchet teardown | Internal wear on gears/pawl | Replace ratchet assembly |
| Cover lens stock | Inventory of spares on hand | Restock outer/inner lenses |
| Certification markings | Legibility of Z87+ and shade markings | Note for documentation if worn |
Annual Inspection
| Item | What to Check | Action if Failed |
|---|---|---|
| Full helmet teardown | Every component inspected individually | Replace worn parts or entire helmet |
| Shell integrity | UV brittleness, stress cracks, flex test | Retire shell if compromised |
| ADF switching speed | Compare to spec (typically 1/25,000 sec) | Replace ADF if noticeably slower |
| Optical clarity rating | Visible haze or distortion vs. new | Replace ADF or full helmet |
| Overall service life review | Total hours/years in service | Budget for full replacement if near end of life |
Cleaning a Welding Helmet Properly
Cleaning sounds simple until you scratch a $150 ADF cartridge with the wrong rag or fog up your lens permanently with the wrong solvent. Here’s how to do it without damaging anything.
Safe Cleaners
Mild dish soap diluted in warm water is the safest all-purpose cleaner for the shell, headgear, and cover lenses. For the ADF lens itself, use plain water or a lens-specific anti-static cleaner designed for optics. Isopropyl alcohol in small amounts is acceptable for the plastic shell and headgear, but keep it away from the ADF’s liquid crystal layer.
What Chemicals to Avoid
Never use acetone, lacquer thinner, brake cleaner, or other aggressive solvents anywhere near the ADF cartridge, these can cloud or dissolve the polarizing layers permanently. Avoid ammonia-based glass cleaners (like standard Windex) on polycarbonate lenses, since ammonia causes microscopic crazing and clouding over time on that material. Skip abrasive cleaners, paper towels, and shop rags with any grit in them, they’re the number one cause of fine scratches on cover lenses.
The Microfiber Cloth Rule
A clean microfiber cloth is the only tool that should ever touch the ADF lens directly. Keep a dedicated microfiber cloth in a sealed bag in your welding kit, one that never touches anything but the lens, so it doesn’t pick up grit from your pockets or workbench.
Cleaning the Inside
Wipe the interior cover lens with a dry or slightly damp microfiber cloth. Check the ADF housing for dust that’s worked its way behind the inner lens; if it has, remove the inner cover lens (most snap out without tools) and clean both sides before reinstalling.
Cleaning the Outside
Wipe the outer cover lens and shell with mild soap and water, rinse with a damp cloth, and dry immediately with a clean microfiber towel to prevent water spotting. For grease or oil buildup around the sensors, use a cotton swab dampened with water, never solvent, to gently clear the sensor windows without scratching them.
Drying and Storage After Cleaning
Air dry or towel dry completely before storing. Trapped moisture inside a closed helmet bag encourages mold growth in the sweatband and padding and can corrode battery contacts over time.
Common Cleaning Mistakes
Spraying cleaner directly onto the ADF (always spray the cloth, not the lens), using the same rag for the helmet and for wiping down tools, cleaning with gloves that have grinding dust embedded in the seams, and storing a still-damp helmet in a sealed bag are the most common ways welders damage their own optics during “maintenance.”
Cleaning Products Reference Table
| Part | Safe to Use | Avoid |
|---|---|---|
| ADF lens (auto-darkening cartridge) | Dry microfiber cloth, plain water, optical lens cleaner | Acetone, ammonia glass cleaner, paper towels, compressed air at high PSI |
| Cover lenses (polycarbonate) | Mild soap and water, microfiber cloth | Ammonia-based cleaners, abrasive pads |
| Shell / housing | Soap and water, isopropyl alcohol (small amounts) | Solvents, degreasers, petroleum-based cleaners |
| Sweatband / padding | Hand wash with mild detergent, air dry | Machine washing/drying, bleach |
| Battery contacts | Dry cloth, pencil eraser for light corrosion | Water, liquid contact cleaner without drying fully |
Welding Helmet Battery Replacement
Every auto-darkening helmet runs on batteries, even the solar-assisted ones. The solar cell supplements power in bright conditions, but lithium coin batteries are not rechargeable, so the arc or sunlight never actually recharges them. Understanding how the power system works makes it obvious why batteries eventually need replacing on a schedule, not just when the helmet dies mid-weld.
How Batteries Work in an ADF Helmet
The battery powers the arc sensors, the liquid crystal shutter, and the control circuitry that manages shade, sensitivity, and delay settings. The battery chamber usually sits right next to the ADF control panel, shielded from spatter and debris during welding.
Solar-Assisted vs. Battery-Only Helmets
A small solar cell on solar-assisted helmets helps power the sensors and filter, extending how long the battery lasts, especially in well-lit shops. But the solar panel alone can’t run the helmet, it supplements the battery rather than replacing it, which is why even solar hoods still need periodic battery swaps.
Replaceable vs. Sealed Batteries
Some auto-darkening helmets have a battery compartment with a removable cover, making the swap straightforward, while other budget and mid-range helmets use batteries that are soldered in place and not meant to be user-replaced. Sealed-battery helmets can often still be opened and repaired with basic soldering skills and a bit of patience, though it voids any warranty and isn’t something every welder wants to attempt.
Common Battery Types
CR2450 and CR2032 lithium coin cells are the two most common battery types used across the industry. CR2450 batteries are frequently found in helmets from Miller and Lincoln Electric, while CR2032 cells are common in helmets from Optrel and 3M. Some helmets use CR2025 cells, and higher-end helmets with built-in PAPR respirators use larger rechargeable battery packs for the fan unit, which is a separate system from the ADF’s coin cell.
Step-by-Step Battery Replacement
- Identify your battery type. Check the manual, the battery compartment itself, or the old battery’s markings, most helmets take one or two coin cells.
- Remove the ADF cartridge from the helmet if the battery tray is on the back of the cartridge rather than accessible from outside the shell.
- Open the battery compartment. Most helmets use a slide-out battery tray that opens with a fingernail or a small coin, without needing special tools.
- Note polarity before removing the old battery, take a photo if you’re not sure which side faces up.
- Insert the new battery matching the polarity exactly. Wear gloves or handle by the edges only; skin oils on the contacts can affect conductivity over time.
- Close the compartment and reinstall the cartridge into the shell if you removed it.
- Test the trigger against a bright light or lighter flame in a safe area before returning to actual welding.
Testing After Replacement
Cycle the lens several times against a bright light source, checking that it darkens instantly and clears cleanly with no flicker. If your helmet has a test button, use it. Try each mode the helmet supports, weld, cut, and grind, to confirm the electronics are fully powered.
Common Battery Mistakes
Mixing an old and new battery in a two-battery helmet (always replace both at the same time), forcing a battery in backward, using a rechargeable battery in place of a lithium primary cell, and assuming a solar panel means batteries never need replacing are the most frequent errors welders make.
Signs a Battery Is Failing
- Delayed darkening when the arc strikes
- Flickering during welding, especially at low amperage
- A dim, flashing, or dead low-battery indicator light
- The helmet failing to power on at all
- Inconsistent shade level between weld cycles
Welding Helmet Battery Lifespan Table
| Usage Type | Typical Battery Life | Notes |
|---|---|---|
| Heavy daily industrial use | 6–18 months | Solar assist extends life closer to the higher end |
| Moderate shop use | 1–2 years | Typical for fabrication shop welders |
| Light hobby/weekend use | 2–4 years | Some welders report going 3–4 years between replacements on adjustable-shade helmets under light use |
| Total hours of active arc time | A CR2032 cell typically lasts roughly 1,500 to 2,000 hours of actual welding time, with solar-assist helmets extending that further | |
| Unused shelf storage | Lithium coin batteries have a shelf life of roughly ten years at room temperature, but heat significantly shortens that, dropping to around four years in consistently hot storage conditions | |
How to Replace a Welding Helmet Lens
“Lens” on a welding helmet can mean three different things, and knowing which one you’re replacing matters.
Outer Cover Lens
This is the sacrificial clear polycarbonate lens on the outside of the helmet, closest to the arc. It takes the brunt of spatter and grinding debris and is designed to be replaced frequently and cheaply, protecting the far more expensive ADF cartridge behind it.
Inner Cover Lens
A second, smaller clear lens sits on the inside of the ADF, between the cartridge and your eyes. It protects the ADF from dust and debris on the wearer’s side and rarely needs replacing unless it gets scratched from the inside, usually from careless cleaning.
Auto-Darkening Lens (ADF Cartridge)
This is the electronic heart of the helmet, the part that actually darkens. It’s the most expensive component and the one most worth protecting with good cover lens habits, since ADF cartridges are not meant to be replaced as often as cover lenses.
Clear Cover / Grind Lens
Some helmets include a separate clear or light-shade lens for grinding mode, allowing full visibility when the ADF is set to its lightest state or bypassed entirely.
Step-by-Step Lens Replacement
- Identify which lens needs replacing, outer cover, inner cover, or the ADF cartridge itself, based on where the damage is.
- Remove the front bezel or retaining frame. Most helmets use a snap-fit or screw-down frame that holds the cover lenses in place; consult your specific model’s manual for the release mechanism.
- Pop out the damaged lens. Cover lenses typically flex slightly and pop out from one corner.
- Clean the lens frame and cartridge face before installing the new lens, dust trapped between layers is a common source of “phantom scratches” that show up under work lighting.
- Install the new lens, matching the correct orientation (some lenses have a textured or anti-fog side that must face outward).
- Snap or screw the retaining frame back into place, checking that it seats evenly on all sides with no gaps.
- Test the fit and clarity under normal light before welding, checking for any distortion, gaps, or rattling.
Cleaning Before Installation
Always clean both sides of a new lens before installing it, lenses often ship with a thin protective film or factory residue that needs to be wiped away first, and fingerprints from handling can be mistaken for lens defects later.
Alignment
A lens that isn’t seated flush will show a visible gap or an uneven line of light around the edge, and this is more than a cosmetic problem, it’s a gap in radiation protection. Recheck that the lens sits flat against the ADF cartridge with no light bleeding around the frame.
Testing After Replacement
Confirm the ADF still triggers correctly with the new lens installed. Check for any new distortion or haze introduced by the replacement lens itself, and make sure the retaining frame isn’t putting uneven pressure on one side of the ADF cartridge, which can cause optical distortion even with a perfect lens.
How Often Should You Replace the Lens?
There’s no single number that applies to every welder, but there are clear signals that tell you it’s time, and a rough schedule you can plan around.
Scratches
Fine scratches on a cover lens scatter light and create glare, especially noticeable when welding under bright shop lighting or outdoors. Once you notice yourself tilting your head or repositioning to see around a scratch, replace the lens, don’t wait for it to get worse.
Spatter Damage
Small spatter craters on the outer cover lens are normal and expected; that’s the lens doing its job. The problem starts when spatter buildup becomes dense enough to visibly darken or cloud the lens even after cleaning, or when a piece of spatter has actually pitted deep enough to weaken the lens itself.
UV Damage
Polycarbonate lenses yellow and become more brittle with cumulative UV exposure over time, even without visible scratches. A lens that’s noticeably yellowed compared to a fresh one from the same pack is losing optical performance and should be swapped.
Visibility Reduction
Any noticeable haze, distortion, or reduction in your ability to clearly see the puddle and joint line is reason enough to replace the lens, regardless of how “not that bad” it looks under normal light.
Professional Recommendations
Most welding safety trainers recommend treating outer cover lenses as a weekly-to-monthly consumable for anyone welding daily, and inspecting them visually every single shift. Inner cover lenses and clear grind lenses last considerably longer since they’re shielded from direct spatter exposure.
Heavy-Use Schedule
Production welders running MIG or flux-core all day, especially in high-spatter processes, often replace outer cover lenses weekly or even more frequently. ADF cartridges in heavy industrial use are typically evaluated annually and replaced every 2–5 years depending on how well they’ve been protected by cover lenses.
Light-Use Schedule
Hobbyist and occasional welders can often get months out of a single cover lens and years out of an ADF cartridge, provided the helmet is stored properly and the lens isn’t damaged during infrequent use.
Lens Replacement Interval Table
| Lens Type | Heavy/Daily Use | Light/Occasional Use |
|---|---|---|
| Outer cover lens | Every 1–4 weeks | Every 3–6 months |
| Inner cover lens | Every 3–6 months | Every 1–2 years |
| ADF cartridge | Every 2–5 years | 5–10+ years |
| Clear/grind lens | Every 1–3 months | Every 6–12 months |
Replacing Headgear on a Welding Helmet
Headgear is the ratchet, straps, and padding assembly that holds the shell on your head. It takes constant mechanical stress and sweat exposure, making it one of the more frequently replaced subsystems on any helmet.
When to Replace Headgear
Replace headgear when the ratchet no longer holds tension reliably, when straps are stretched, torn, or brittle, when padding has compressed flat and no longer cushions the forehead and crown, or when the pivot points that connect the headgear to the shell are cracked or loose.
Removal
- Locate the pivot points where the headgear attaches to the shell, usually two side clips or screw-mounted pivots.
- Release the clips or remove the mounting screws, keeping hardware organized since sizes can vary between the two sides.
- Slide the old headgear assembly free of the shell.
Installation
- Confirm the replacement headgear is the correct model match, headgear mounting points vary between brands and even between model years of the same brand.
- Align the new headgear’s pivot points with the shell’s mounting slots.
- Snap or screw the pivots into place, checking that both sides move freely and evenly.
- Adjust the ratchet to a neutral, mid-range setting before fitting to your head.
Adjustment and Comfort Fitting
Set the ratchet so the helmet sits level and doesn’t rock front-to-back. The crown strap should support most of the weight rather than the front headband alone, a common mistake that causes forehead pressure and headaches during long shifts. Adjust the pivot tilt so the helmet’s resting position (flipped up) and welding position (flipped down) both feel natural without you having to crane your neck.
Professional Tips
Break in new headgear over a few short sessions rather than a full shift, since padding and straps settle slightly after initial use. Keep the ratchet mechanism free of weld dust by wiping it during your weekly cleaning pass, grit inside the ratchet teeth is the number one cause of premature ratchet failure.
Fixing a Loose Welding Helmet
A helmet that shifts, slides down, or won’t hold its adjustment is more than an annoyance, it forces welders to constantly readjust with a gloved hand, sometimes mid-weld, which is a safety risk in itself. There are several distinct causes, and the fix depends on which one you’re dealing with.
Worn Ratchet
The most common cause of a slowly loosening helmet. Ratchet gears wear down from years of use, and the pawl that holds tension can wear rounded instead of sharp, letting it slip under the weight of the shell. Fix: replace the ratchet assembly, most are a standalone replacement part.
Loose Knobs
Adjustment knobs that don’t fully tighten, often due to stripped internal threads or a cracked knob body. Fix: replace the knob itself, which is usually inexpensive and doesn’t require replacing the full headgear.
Damaged Pivot
The pivot points connecting headgear to shell can crack or develop play over time, causing the whole helmet to wobble independently of ratchet tension. Fix: inspect the pivot housing closely; hairline cracks mean the headgear or shell needs replacing, since a failed pivot can let the shell detach entirely during use.
Headgear Wear
Stretched straps or compressed padding reduce the total clamping force even when the ratchet itself is fine. Fix: replace the headgear kit as a full assembly.
Incorrect Adjustment
Sometimes a “loose” helmet is simply set up wrong, ratchet too loose, crown strap not engaged, or pivot tilt set incorrectly for your head shape. Fix: run through a full readjustment from scratch rather than just cranking the ratchet tighter, which can mask other problems.
Broken Parts
Cracked plastic housings, snapped strap buckles, or a broken ratchet knob all need direct part replacement, there’s no adjustment that fixes a physically broken component.
Repair vs. Replacement
Ratchets, knobs, and straps are almost always available as standalone replacement parts and are worth repairing individually. A cracked shell or a headgear pivot molded directly into a damaged shell usually means it’s more practical to replace the whole helmet, especially on budget models where a full headgear kit costs a significant fraction of a new helmet’s price.
Troubleshooting Table
| Symptom | Likely Cause | Fix |
|---|---|---|
| Helmet slowly slides down during use | Worn ratchet or loose knob | Replace ratchet or knob |
| Helmet wobbles side to side | Damaged or worn pivot points | Replace headgear or shell |
| Lens fails to darken | Dead battery or dirty sensor | Replace battery, clean sensors |
| Lens flickers during welding | Low battery or low-amperage TIG below sensor threshold | Replace battery, increase sensitivity setting |
| Lens stays dark after welding stops | Delay set too high, or stuck ADF | Adjust delay setting, inspect cartridge |
| Forehead pressure/headache | Crown strap not engaged, uneven adjustment | Re-fit headgear, engage crown strap fully |
| Fogging inside the lens | Poor ventilation, humid environment | Check vents, consider anti-fog lens (X-rated) |
| Visible haze across the lens | UV-degraded or scratched cover lens | Replace cover lens |
How Long Do Welding Helmets Last?
Helmet lifespan depends heavily on build quality, how it’s used, and how well it’s maintained, but there are realistic ranges you can plan around.
Budget Helmets
Entry-level helmets in the $30–80 range typically last 1–3 years under regular use before the ADF, ratchet, or shell shows real wear. These often use sealed, non-replaceable batteries and simpler ADF electronics that degrade faster.
Mid-Range Helmets
Helmets in the $100–250 range, from brands like Jackson Safety, Antra, or entry Lincoln/Miller models, generally last 3–6 years with good care, thanks to more durable shells, replaceable batteries, and better-built ratchets.
Premium Helmets
High-end helmets from 3M Speedglas, Optrel, Miller Digital Performance, and top Lincoln Viking models are built for professional daily use and commonly last a properly maintained helmet can run 3 to 10 years on average, with consistent care and lens replacement extending that further. Some professional welders report a decade or more of service from premium hoods with disciplined maintenance.
ADF Lifespan
The auto-darkening cartridge itself, if protected by cover lenses and not physically damaged, can outlast several headgear replacements. Optical performance does slowly degrade over many years of UV exposure, which is why an annual side-by-side comparison against a new lens is worth doing on older helmets.
Battery Lifespan
As covered earlier, batteries typically need replacement every 6 months to a few years depending on usage intensity and whether the helmet has solar assist.
Shell Durability
Shells generally outlast every other component if kept out of direct sun when not in use and away from extreme heat, but they do become more brittle with age even without visible damage, which is why the annual flex-and-inspect check matters even on a helmet that “looks fine.”
Maintenance Impact
Helmets that get regular cleaning, timely cover lens swaps, and proper storage routinely outlast neglected helmets by two to three times, even when they’re the exact same model.
Storage Impact
A helmet left on a dusty shelf in direct sunlight or in a hot truck cab will degrade far faster than one stored in a helmet bag in a climate-controlled space, primarily due to UV exposure and heat accelerating both plastic brittleness and battery drain.
Daily Industrial Use vs. Occasional Hobby Use
A helmet used 8+ hours a day, 5 days a week in a fabrication shop experiences dramatically more wear cycles on the ratchet, more spatter exposure on the lens, and more battery drain than a hobby helmet used a few hours a month, expect industrial helmets to need parts replacement on a noticeably faster schedule even if the total years of ownership look similar.
Helmet Lifespan Comparison Table
| Helmet Tier | Typical Price Range | Expected Lifespan (Regular Use) |
|---|---|---|
| Budget | $30–$80 | 1–3 years |
| Mid-range | $100–$250 | 3–6 years |
| Premium/Professional | $250–$600+ | 5–10+ years |
When to Replace a Welding Helmet
Some problems can be fixed with a new part. Others mean it’s time to retire the whole helmet.
Cracked Shell
Any crack that compromises the shell’s structural integrity, especially near the ADF housing or headgear pivots, is a full-helmet replacement issue, since a cracked shell can no longer reliably pass an impact.
Failed ADF
If the ADF won’t trigger reliably even with a fresh battery, clean sensors, and correct settings, the cartridge itself has failed. On many budget helmets, replacing the ADF costs nearly as much as a new helmet, making full replacement the more practical option.
Sensor Failure
Sensors that no longer detect the arc even when visibly clean point to internal electronic failure rather than a cleaning problem, and typically mean the ADF cartridge needs replacing.
Damaged Headgear Beyond Repair
If the shell’s headgear mounting points themselves are cracked or stripped, not just the headgear assembly, replacement parts may no longer seat securely, pointing toward full helmet replacement.
Optical Distortion
Persistent waviness, double vision, or distortion through the lens that isn’t fixed by replacing cover lenses usually means the ADF’s internal optics have degraded and the cartridge needs replacing.
Burn Marks
Scorch marks or melted spots on the shell or lens frame indicate the helmet was exposed to heat or spatter beyond its design tolerance, and the affected area’s protective properties can no longer be trusted.
Electrical Failure
A helmet that won’t power on with a known-good, correctly installed battery, and doesn’t respond to any reset procedure in the manual, has failed electronically and needs either a new ADF cartridge or full replacement.
General Replacement Recommendation
As a rule of thumb: if a repair (new ADF, new shell, or new headgear) costs more than 60–70% of a comparable new helmet’s price, replacing the whole unit is usually the better value, especially since you’ll also get updated sensor technology and optical clarity ratings.
Storage Tips
Temperature
Store helmets at moderate room temperature. Extreme heat, like a closed vehicle in summer, accelerates battery drain and speeds up plastic brittleness in the shell and cover lenses.
Humidity
High humidity encourages corrosion on battery contacts and mold growth in sweatbands and padding. A dry storage area, or a helmet bag with some airflow, helps prevent both.
Dust
Dust settling into the ratchet mechanism and sensor windows over long storage periods is one of the most common causes of “it worked fine last time I used it” complaints. A closed bag or cabinet keeps dust exposure to a minimum.
Sunlight
Direct UV exposure during storage, like leaving a helmet on a dashboard or windowsill, accelerates shell yellowing and brittleness even when the helmet isn’t in use. Store helmets in shade or inside a bag whenever possible.
Workshop Storage
A dedicated hook or shelf away from grinding stations and spark-producing work keeps the helmet from picking up stray spatter or dust between uses. Avoid storing it directly on top of a welding cart where it can pick up residual heat.
Travel
For welders who move between job sites, a hard-sided or padded helmet bag prevents crushing damage to the shell and protects the ADF from impact during transport in a truck bed or toolbox.
Protective Bags
A simple drawstring or zippered helmet bag is inexpensive and dramatically extends helmet life by protecting against dust, UV, and impact during storage and transport, it’s one of the highest-value, lowest-cost maintenance habits a welder can adopt.
Common Maintenance Mistakes
- Cleaning the ADF with paper towels, introduces fine scratches that permanently reduce clarity.
- Using ammonia-based glass cleaner, causes microscopic crazing on polycarbonate lenses over time.
- Spraying cleaner directly onto the lens, liquid can seep behind the ADF housing and damage electronics.
- Ignoring a flickering low-battery light, leads to unexpected mid-weld failure and possible flash exposure.
- Mixing old and new batteries in a dual-cell helmet, causes uneven power delivery and premature failure.
- Skipping the daily visual check, most helmet failures show warning signs days before they become dangerous.
- Storing the helmet in direct sunlight, accelerates shell brittleness and lens yellowing.
- Leaving a sweat-soaked helmet sealed in a bag, promotes mold and bacterial growth in padding.
- Welding with a cracked cover lens “just for one more pass”, compromises radiation protection immediately, not eventually.
- Over-tightening the ratchet to compensate for worn gears, accelerates stripping instead of solving the real problem.
- Using compressed air at high PSI to blow out the ADF, can force debris deeper into the housing or damage seals.
- Never rotating or replacing cover lenses, lets a cheap sacrificial part fail to protect an expensive ADF cartridge.
- Assuming solar assist means batteries never need replacing, solar only supplements power, it doesn’t eliminate the battery’s role.
- Buying off-brand ADF cartridges that don’t match certification specs, can compromise UV/IR protection even if they “look” the same.
- Ignoring sensor buildup after grinding, grinding dust is especially prone to packing into sensor windows.
- Forcing a battery in backward, can damage the circuit board and void warranty coverage.
- Skipping the annual full teardown inspection, many failure points are invisible during a quick daily glance.
- Sharing a helmet between welders without adjusting fit, leads to improper seating and gaps in coverage around the face.
- Storing headgear straps compressed or twisted for long periods, causes premature material fatigue.
- Not checking certification markings after years of use, worn-off Z87+ markings can fail a job site safety audit even if the helmet itself is fine.
Professional Maintenance Tips
- Keep a dedicated microfiber cloth in a sealed bag, used only on the ADF lens.
- Stock cover lenses in bulk, they’re cheap and you’ll actually replace them if you have them on hand.
- Test the auto-darkening trigger against a lighter flame or bright flashlight before every shift, not just when something feels off.
- Keep a spare battery of the correct type in your welding bag at all times.
- Replace both batteries at once in dual-cell helmets, even if only one seems weak.
- Use a helmet bag for transport and storage, every time, not just for long trips.
- Clean sensor windows with a dry cotton swab after every grinding-heavy session.
- Avoid setting the helmet lens-down on a dirty bench, it invites scratches from grit on the surface.
- Hand wash sweatbands weekly if you weld daily; don’t wait for visible saturation.
- Keep the ratchet mechanism free of weld dust with a quick wipe during weekly cleaning.
- Log battery and lens replacement dates on a piece of tape inside the helmet shell for quick reference.
- Do a side-by-side optical comparison against a brand-new ADF once a year to catch slow degradation you might not notice day to day.
- Never leave the helmet in a hot vehicle for extended periods.
- Inspect the neck cape or cape stitching before overhead or out-of-position welding sessions specifically.
- Break in new headgear gradually rather than wearing it for a full shift on day one.
- Set the crown strap to carry most of the helmet’s weight, not the front headband alone.
- Match sensitivity settings to your amperage range, low-amp TIG needs higher sensitivity to trigger reliably.
- Don’t ignore delay setting issues; a lens that stays dark too long after stopping can be as disorienting as one that opens too early.
- Keep manufacturer manuals or PDFs saved for exact part numbers when ordering replacement components.
- Buy ADF cartridges and lenses from authorized dealers to guarantee genuine ANSI Z87.1 or EN 379 certified parts.
- Rotate between two helmets if you weld across multiple environments (indoor fab shop vs. outdoor pipeline) to reduce wear concentration on one unit.
- Check optical clarity ratings (like 1/1/1/1 under EN 379) when replacing an ADF, don’t just match shade range.
- Avoid stacking heavy tools or gear on top of a stored helmet.
- Train new or junior welders on proper cleaning technique, most helmet damage in shared-equipment shops comes from improper cleaning by someone unfamiliar with the gear.
- Treat your welding helmet with the same seriousness as your welding machine, schedule its maintenance instead of reacting to failures.
Frequently Asked Questions
Can I use regular glass cleaner on my welding helmet lens?
No. Ammonia-based glass cleaners like standard Windex can cause clouding and micro-crazing on polycarbonate lenses over time. Stick to mild soap and water or an optical-specific cleaner.
Why does my auto-darkening helmet flicker during low-amp TIG welding?
Low-amperage TIG produces less light for the sensors to detect, which can cause flicker if sensitivity is set too low or the battery is weak. Increase sensitivity and check battery condition first.
Is it safe to weld with an expired or non-certified replacement ADF?
No. Off-brand cartridges without proper ANSI Z87.1 or EN 379 certification may not reliably block UV/IR radiation, even if the shade appears correct to the eye.
How do I know if my helmet’s certification markings are still valid?
Check that the Z87+ marking on both the shell and lens is still legible. If it has worn off, the helmet may fail a job site safety audit even if it’s functioning correctly.
Can I replace just the ADF cartridge instead of buying a new helmet?
Yes, on most mid-range and premium helmets the ADF is a standalone replaceable part. On budget helmets, check the price difference first, sometimes a new helmet costs barely more than the replacement cartridge.
How long does a welding helmet battery actually last in hours?
A typical CR2032 cell provides roughly 1,500–2,000 hours of active welding time, though this varies by helmet model and whether solar assist is present.
Do solar-assisted helmets ever need a battery replacement?
Yes. The solar panel supplements the battery in bright conditions but doesn’t recharge it, lithium coin batteries used in these helmets aren’t rechargeable, so they still wear out and need periodic replacement.
What’s the difference between the outer cover lens and the ADF cartridge?
The outer cover lens is a cheap, sacrificial clear plastic shield that takes spatter damage. The ADF cartridge is the electronic auto-darkening component behind it, which is far more expensive and should be protected by keeping the cover lens in good condition.
Can a cracked welding helmet shell be repaired instead of replaced?
Generally no, especially for cracks near the headgear pivots or ADF housing. A compromised shell can’t reliably pass impact testing, so replacement is the safer option.
How often should I replace the sweatband?
Replace it as soon as it shows saturation, odor, or hardened salt buildup that doesn’t come out with hand washing, typically every few months for daily users.
Why does my helmet keep sliding down during welding?
This is almost always a worn ratchet, a loose adjustment knob, or stretched headgear straps. Start by inspecting the ratchet mechanism for slipping.
Is it normal for a welding helmet to smell bad after a few months?
Some odor from sweat is normal, but a strong or persistent smell usually means the sweatband and padding need washing or replacing, and possibly indicates trapped moisture during storage.
Can I use AAA or AA batteries instead of coin cells in my helmet?
Only if your specific helmet model is designed for them, some budget and older helmets do use standard AA or AAA batteries, but most modern auto-darkening helmets use CR2032 or CR2450 lithium coin cells. Check your manual before substituting.
How do I know if it’s time to replace the entire helmet instead of individual parts?
If the cost of replacing the ADF, shell, or headgear approaches 60–70% of a new comparable helmet’s price, or if the shell itself is structurally compromised, full replacement is usually the better value.
Recommended External Authority Sources
For welders and safety officers who want to go straight to the source, these are the official standards bodies and manufacturer resources referenced throughout this guide.
- OSHA – Welding, Cutting, and Brazing Safety Standards: osha.gov/welding-cutting-brazing
- ANSI/ISEA Z87.1 – Occupational and Educational Eye and Face Protection Standard: webstore.ansi.org/standards/isea/ansiiseaz872020
- Lincoln Electric – Welding Helmets and Accessories: lincolnelectric.com/en/Products/Safety/Head-Face-and-Eye/Welding-Helmets-and-Accessories
- Miller Electric – Welding Helmets: millerwelds.com/products/welding-helmets
- ESAB – PPE and Safety (Head and Face Protection): esab.com/us/nam_en/products-solutions/categories/ppe-safety
- 3M Speedglas – Welding Helmets and Respirator Systems: 3m.com/3M/en_US/speedglas-welding-helmets-us
Conclusion
A welding helmet isn’t a one-time purchase you forget about until it breaks. It’s a system of consumable parts, cover lenses, batteries, headgear, sweatbands, wrapped around one expensive, critical component: the ADF cartridge protecting your eyes. Build the daily two-minute check into your routine, keep spare batteries and cover lenses on hand, clean the ADF only with a dry microfiber cloth, and take the annual full teardown seriously even on a helmet that seems fine. Do that consistently, and a mid-range or premium helmet will comfortably outlast its expected lifespan while keeping you fully protected every time you strike an arc. Skip it, and you’re gambling with the one piece of PPE standing between your eyes and permanent damage.
Hi, I’m Zachary Ford. I’m passionate about welding and dedicated to helping both beginners and experienced welders make informed decisions. I research, test, and write about welding helmets, welding machines, safety equipment, and essential workshop tools. My goal is to provide honest reviews, practical buying guides, and easy-to-follow tutorials that help you weld more safely, work more efficiently, and choose the right gear with confidence.