
Welding Helmet Troubleshooting
Welding is a demanding craft that requires both skill and proper safety equipment. Among all protective gear, the welding helmet stands out as essential. It shields your eyes, face, and neck from intense light, sparks, and radiation. But even the best helmet can run into problems. When your helmet fails, your safety and work quality suffer. Understanding how to troubleshoot welding helmet issues is critical for every welder, whether you’re a beginner or have years of experience.
This guide will walk you through common welding helmet problems, how to diagnose and fix them, and give you practical tips to keep your helmet reliable. If you’ve ever faced flickering lenses, foggy views, or discomfort during long welds, you’ll find answers here.
Common Welding Helmet Problems
Welding helmets come in several types, including passive (fixed shade) and auto-darkening. Each type has its own set of issues, but some problems are universal.
Auto-darkening Lens Not Working
Many welders prefer auto-darkening helmets for their convenience. But when the lens fails to darken, it’s not just frustrating—it’s dangerous.
Symptoms:
- The lens stays light during welding.
- Delayed or inconsistent darkening.
- Flickering between light and dark states.
Possible Causes:
- Dead or weak batteries.
- Faulty solar panel (in solar-powered models).
- Damaged sensors.
- Internal circuit failure.
Poor Visibility Or Blurry Vision
Clear vision is vital for quality welding. When your view is blocked or unclear, it affects both your safety and your welds.
Symptoms:
- Foggy or blurry lens.
- Scratches or pits on the lens.
- Spots or smudges that don’t wipe off.
- Distortion around the edges.
Possible Causes:
- Dirty or damaged lens cover.
- Interior condensation.
- Aging lens material.
- Incorrect lens shade.
Helmet Feels Uncomfortable
A helmet that doesn’t fit well can distract you and even cause headaches.
Symptoms:
- Pressure points on the forehead or back of the head.
- Helmet slipping or tilting.
- Difficulty adjusting the fit.
Possible Causes:
- Worn or broken headgear.
- Incorrect adjustment.
- Helmet too heavy for the user.
Light Leakage
Even a small amount of light entering the helmet can cause discomfort or eye strain.
Symptoms:
- Seeing flashes of light around the edges.
- Eye fatigue after short welding sessions.
Possible Causes:
- Improper fit or size.
- Damaged seals or padding.
- Cracked helmet shell.
Helmet Won’t Stay Up Or Down
A loose helmet can interrupt your work and create safety risks.
Symptoms:
- Helmet falls down when raised.
- Won’t stay lowered during welding.
Possible Causes:
- Loose tension knobs.
- Worn pivot points.
- Broken locking mechanism.
Diagnosing The Problem
Before fixing any issue, you need to find the root cause. Here’s a practical approach to diagnosing common welding helmet troubles.
- Visual Inspection
- Check the lens for scratches, cracks, or dirt.
- Inspect the helmet shell for damage.
- Look at the headgear for worn or missing parts.
- Functional Test
- For auto-darkening helmets, test the lens by exposing it to a bright light (like sunlight or a flashlight).
- Check response time and consistency.
- If the helmet uses batteries, replace them with fresh ones to rule out power issues.
- Fit and Comfort Check
- Adjust the headgear to your head size.
- Wear the helmet and move your head. It should stay secure without pinching.
- Light Test
- In a dark room, wear the helmet and shine a light around the edges. Check for leaks.
- Note any flashes or discomfort.
Identifying the exact problem helps you avoid unnecessary repairs or replacements.
Troubleshooting Auto-darkening Helmets
Auto-darkening helmets have advanced technology, making them convenient but also more complex. Here’s how to handle their most common issues.
Lens Not Darkening
If your auto-darkening lens isn’t working, start with these steps:
- Check the Batteries: Many helmets use simple coin cell batteries. Replace them, even if they appear fine.
- Test the Sensors: Clean the sensors at the front of the helmet. Dust or spatter can block them.
- Check Solar Panel: Place the helmet under bright sunlight for 10–15 minutes if it has a solar assist. If it still doesn’t work, the panel may be faulty.
- Try a Manual Reset: Some helmets have a reset button. Press it according to the user manual.
If none of these steps work, the problem may be internal. Circuit board issues usually require professional repair or replacement.
Delayed Or Flickering Lens
A lens that flickers or delays can expose your eyes to harmful light. To fix this:
- Inspect for Cracks: Even a small crack in the lens can cause malfunction.
- Check for Loose Connections: Gently tap the helmet. If flickering stops, an internal connection might be loose.
- Replace the Lens Cartridge: If your helmet allows, swap out the lens module.
Sensitivity And Delay Settings
Auto-darkening helmets have controls for sensitivity and delay. If these are set too low or high, the lens may not respond properly.
- Adjust sensitivity so the lens darkens only for welding light, not regular room lighting.
- Set delay to your preference—shorter for tack welding, longer for high-amp welding.
If settings don’t respond, the control circuitry might be damaged.
Troubleshooting Passive Helmets
Passive (fixed-shade) helmets are simple but can still develop problems.
Cracked Or Damaged Lens
A cracked lens can’t protect your eyes. If you see any cracks or deep scratches:
- Replace the lens immediately with the correct shade.
- Check the fit of the new lens to avoid gaps.
Fogging And Visibility Issues
Fogging is common, especially in humid environments.
- Use anti-fog wipes or sprays on the inside of the lens.
- Improve ventilation in your work area.
- Take regular breaks to let the helmet air out.
Comfort And Fit
Passive helmets often have basic headgear. If it’s uncomfortable:
- Replace or upgrade the headgear with a padded version.
- Adjust the straps and band for a snug fit.

Credit: www.scribd.com
Table: Common Welding Helmet Problems And Solutions
To make troubleshooting easier, here’s a quick reference:
| Problem | Likely Cause | Solution |
|---|---|---|
| Auto-darkening lens not working | Dead battery, dirty sensor, faulty panel | Replace battery, clean sensors, test in sunlight |
| Blurry vision | Dirty or scratched lens, condensation | Clean or replace lens, use anti-fog spray |
| Helmet uncomfortable | Worn headgear, poor adjustment | Replace headgear, adjust fit |
| Light leakage | Poor fit, damaged seals | Adjust fit, replace seals |
| Helmet won’t stay up/down | Loose tension knobs, worn pivots | Tighten knobs, replace pivots |
Caring For Your Welding Helmet
Prevention is better than repair. Good care extends your helmet’s lifespan and reduces troubleshooting. Here are practical steps:
- Clean the Lens Regularly
- Use a soft cloth and non-abrasive cleaner.
- Never use harsh chemicals—they can damage coatings.
- Inspect Before Each Use
- Check for cracks, loose parts, or dirt.
- Store Properly
- Keep the helmet in a dry, cool place.
- Avoid leaving it in direct sunlight for long periods.
- Replace Worn Parts
- Change covers and headgear as soon as they show wear.
- Check Batteries and Settings
- For auto-darkening models, keep spare batteries handy.
- Reset controls if the helmet acts up.
- Handle with Care
- Avoid dropping the helmet.
- Protect it from welding spatter and impacts.
Table: Passive Vs. Auto-darkening Helmets – Feature Comparison
Understanding the difference between helmet types helps you diagnose problems more effectively.
| Feature | Passive Helmet | Auto-Darkening Helmet |
|---|---|---|
| Lens Shade | Fixed | Variable (adjustable) |
| Power Source | None | Batteries/Solar |
| Cost | Lower | Higher |
| Maintenance | Low | Medium to High |
| Common Issues | Cracked lens, fogging | Sensor failure, battery issues |
Advanced Troubleshooting Tips
Some helmet issues are less obvious. Here are insights that often surprise beginners:
Sensor Positioning Matters
Auto-darkening helmets use light sensors to trigger the darkening. If you often weld in tight spaces or with one hand blocking the helmet, you might accidentally cover a sensor. This can cause the lens to fail to darken.
Tip: Always keep sensors unobstructed. If your helmet’s sensors are small or poorly placed, consider upgrading to a model with more or larger sensors.
Ambient Light Interference
Bright overhead lights or sunlight can trick your helmet’s sensors. This is especially common in outdoor welding.
Solution: Adjust sensitivity settings to respond only to welding arcs, not general light. If this doesn’t help, shade your work area or move to a spot with less glare.
Electronic Failure Signs
If your auto-darkening lens makes clicking noises, shows random flashes, or has erratic shades, this could indicate a failing electronic component. Unlike batteries or sensors, internal circuits are not user-serviceable.
Advice: Don’t try to open or repair the lens cartridge yourself. Most manufacturers void the warranty if you tamper with electronics. Replace the cartridge or contact the manufacturer for service.
Headgear Wear And Tear
Many welders overlook the headgear, but it’s critical for comfort and safety. Over time, plastic parts can crack, and sweat can degrade padding.
Tip: If adjustments no longer hold, or if the helmet wobbles, replace the headgear. Quality aftermarket headgear can make even a basic helmet much more comfortable.
Correct Shade Selection
Using the wrong lens shade leads to eye strain and poor visibility. Always match the shade to the welding process and amperage.
For example:
- Shade 10: Light MIG or TIG welding (up to 175 amps)
- Shade 12: Most stick welding (100–200 amps)
- Shade 13 or 14: Heavy-duty, high-amperage welding
If you’re unsure, start with a darker shade and move lighter as needed.
Table: Recommended Lens Shade For Welding Types
Selecting the correct shade improves both safety and visibility.
| Welding Type | Amperage Range | Recommended Shade |
|---|---|---|
| MIG Welding | 80–175 A | 10–11 |
| TIG Welding | 5–100 A | 9–10 |
| Stick Welding | 100–200 A | 12 |
| Flux-Cored Arc | 125–175 A | 10–12 |
| Heavy-duty Arc | 200+ A | 13–14 |
When To Repair Vs. Replace
Not all problems can be fixed with cleaning or new batteries. Sometimes, replacement is safer and more cost-effective.
Repair If:
- The headgear is loose but the shell and lens are fine.
- The lens cover is scratched but the main lens works.
- Controls or batteries need replacement.
Replace If:
- The helmet shell is cracked (compromises safety).
- The auto-darkening module fails and repairs cost more than a new helmet.
- Multiple components are worn out.
For helmets certified to ANSI Z87. 1 or EN379 standards, always ensure replacements meet the same safety rating.

Credit: proweldinghelmets.com
Avoiding Common Mistakes
Even experienced welders make errors with their helmets. Here are mistakes to avoid:
- Using a Damaged Lens: Even small cracks reduce protection.
- Ignoring Battery Life: Keep spares for auto-darkening models.
- Forgetting to Adjust Settings: Test helmet response before each job.
- Neglecting Maintenance: Dirty or loose parts cause most problems.
- Buying the Wrong Size: A poor fit means less protection and more discomfort.
Resources For Further Help
If you’ve tried the steps above and still have trouble, consult the helmet manufacturer’s manual or support line. For technical details on helmet standards and safety, visit the OSHA Welding Safety page.
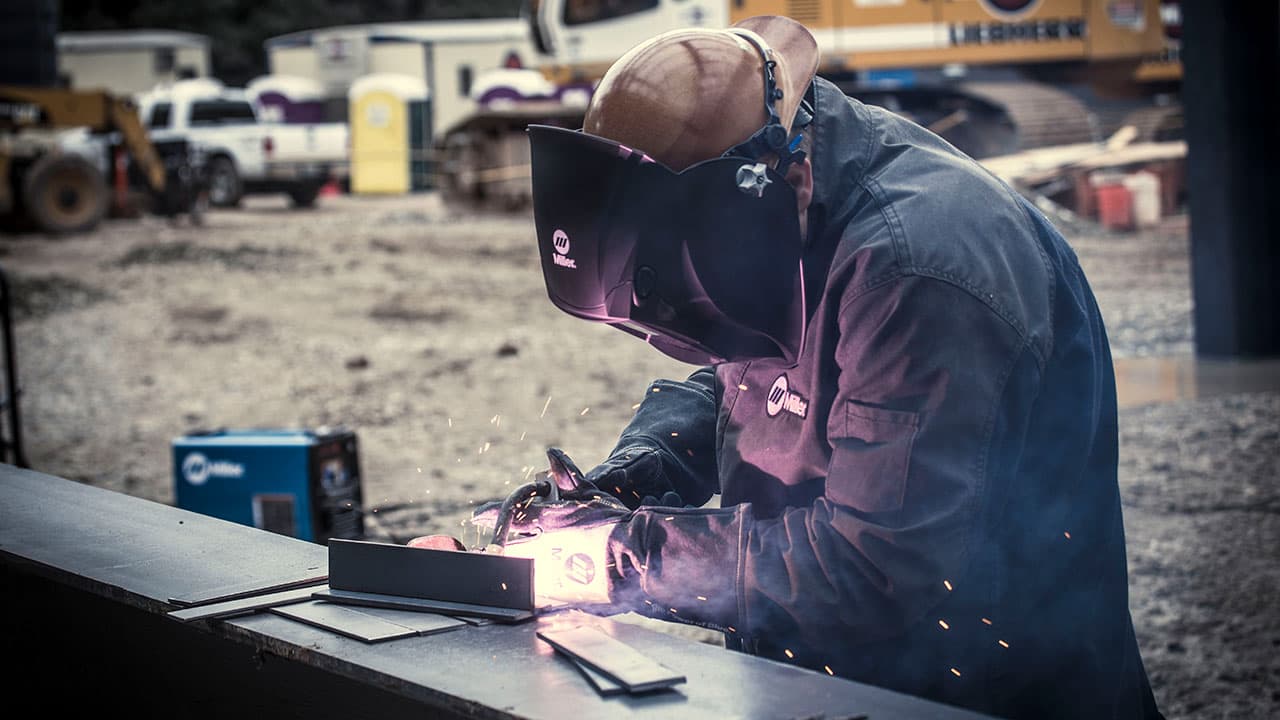
Credit: www.millerwelds.com
Final Thoughts
A welding helmet is your first line of defense against intense light, heat, and flying debris. When it malfunctions, your safety is at risk. Troubleshooting your helmet doesn’t have to be complicated—most issues have clear causes and fixes. Regular inspection, proper care, and timely replacement of worn parts will keep your helmet working as it should.
Remember, your eyes and face are irreplaceable. Don’t ignore warning signs like blurry vision, flickering lenses, or discomfort. Address problems early, and your helmet will protect you for years to come. If you’re ever in doubt, choose safety first and invest in quality gear that meets the highest standards.
By understanding your welding helmet’s functions and possible failures, you’re one step closer to safer, more confident welding.
Hi, I’m Zachary Ford. I’m passionate about welding and dedicated to helping both beginners and experienced welders make informed decisions. I research, test, and write about welding helmets, welding machines, safety equipment, and essential workshop tools. My goal is to provide honest reviews, practical buying guides, and easy-to-follow tutorials that help you weld more safely, work more efficiently, and choose the right gear with confidence.